
Review #49: "Classics" Stunticons
Motormaster, Brakedown, Dead End, Drag Strip, & Wildrider
(Fansproject Causality M3 Crossfire Intimidator)
Hi, everybody! Sorry I've been gone so long. No terribly interesting reason for it, I fear. But I thought I'd try to resurrect things a bit here, and figured I'd quickly write up a short review to ease my way back into things. Nah, who am I kidding? This is actually a big one! So let's delve into the five figures that make up Fansproject's take on the classic Decepticon team, the Stunticons!
Quick disclaimer before we continue: all of the toys being reviewed in this article have been augmented by Reprolabels. They still look good without 'em, but as always the Reprolabels add wonderful finishing touches.
Quick disclaimer before we continue: all of the toys being reviewed in this article have been augmented by Reprolabels. They still look good without 'em, but as always the Reprolabels add wonderful finishing touches.
|
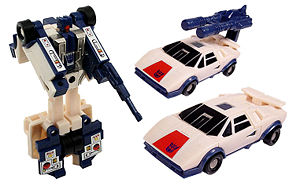
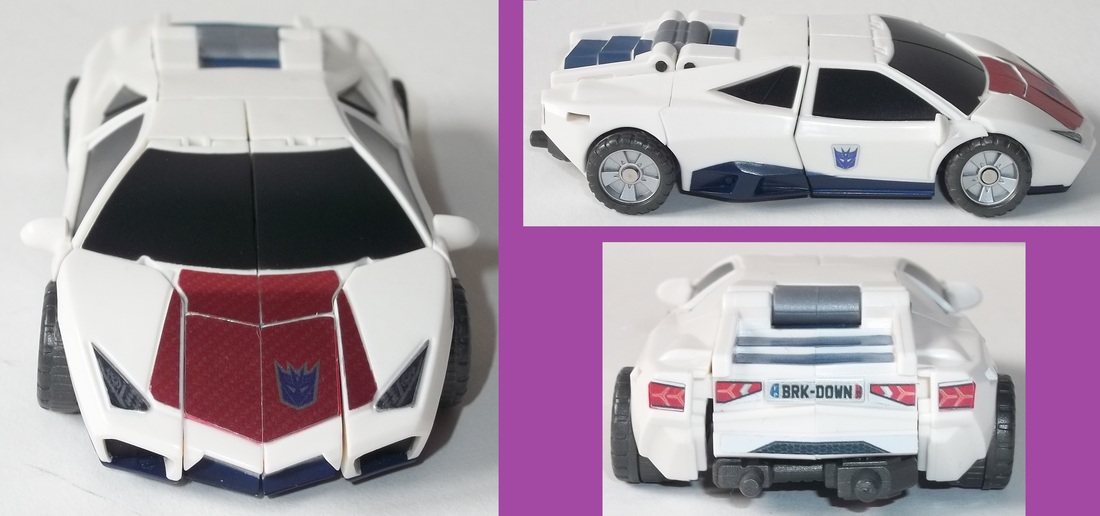
As usual, with third party toys I like showing off what it is based off of for comparative purposes. Most of the Stunticons are sports cars, and Breakdown is a white one. The Fansproject version of the toy, officially named "Car Crash," presents a nice modernized update to the design, including the distinctive red patch on the hood. Of course, adding some Reprolables enlarged the red patch and added other important details.
|
|
Transformation can be a bit fiddly, something that will become something of a theme with this set of figures. Children's toys these are not. But for an adult collector who can take their time, you shouldn't have too many problems. The resulting robot is, much like the car mode, a good update to the original.

The upper body looks exactly like what you might expect a modernized version of the original to look like. The legs are formed differently then on the original, so the front of them ends up white rather then blue, but Reprolabels did nicely homage the stickers over the front of the original's legs with stickers on the inner sides of the legs.
Articulation is excellent, with just about everything you could expect. Ball jointed head, ball jointed shoulders, upper arm swivel, bending elbows, swiveling wrists, a waist swivel, ball jointed hips, upper leg swivels, bending knees, and good ankle articulation. I'm not sure what more you could stuff into a figure this size, which is comparable to a large Scout Class or small Deluxe Class Hasbro figure.
The only accessory he comes with is his hand gun, which splits in half to facilitate storage in vehicle mode.
Well, let us now move on to Wildrider, named "T-Bone" by Fansproject.
|
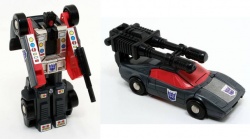
G1 Wildrider was not too different from Breakdown. His vehicle mode was styled a bit differently, and there were some minor differences in transformation, but beyond that they had a lot of similarities. When Fansproject released their second toy in this set, likewise they were pretty similar. Indeed, at a quick glance, they almost seem the same toy.
|
|
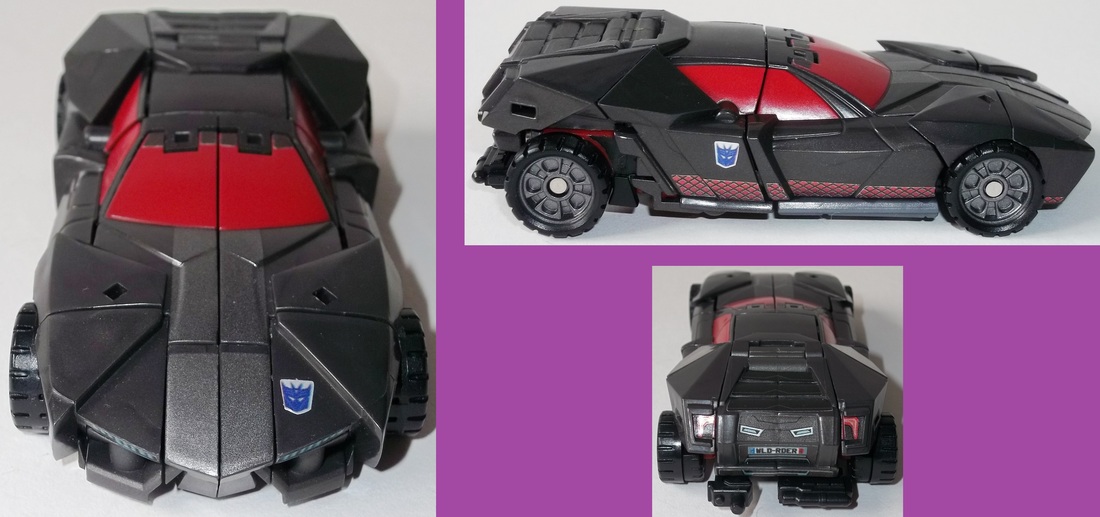
Once again, the vehicle mode looks like a nice update, taking the original and giving it a more modern aesthetic. Transformation is almost identical to Breakdown's, resulting in a similar looking robot. There are definitely enough differences in the mold, however, that after getting past that first impression, you really don't feel anymore like you're just buying the same toy twice.
The robot mode isn't too dissimilar from Breakdown's, but there are enough differences in the sculpt that, combined with the vastly different color scheme, make it so that Wildrider is a distinct character. That there are similarities is to be expected, given that their G1 figures were also similar. His head sculpt is of note, as in the G1 cartoon he had some rather distinctive antennae coming out of the sides of his head. This is the biggest clue that these toys tend to take more of their visual cues more from the G1 toys then from the animation.
Articulation, unsurprisingly, is identical to Breakdown's. And once more, the only accessory is a gun that splits in half for vehicle mode storage.
Articulation, unsurprisingly, is identical to Breakdown's. And once more, the only accessory is a gun that splits in half for vehicle mode storage.
|
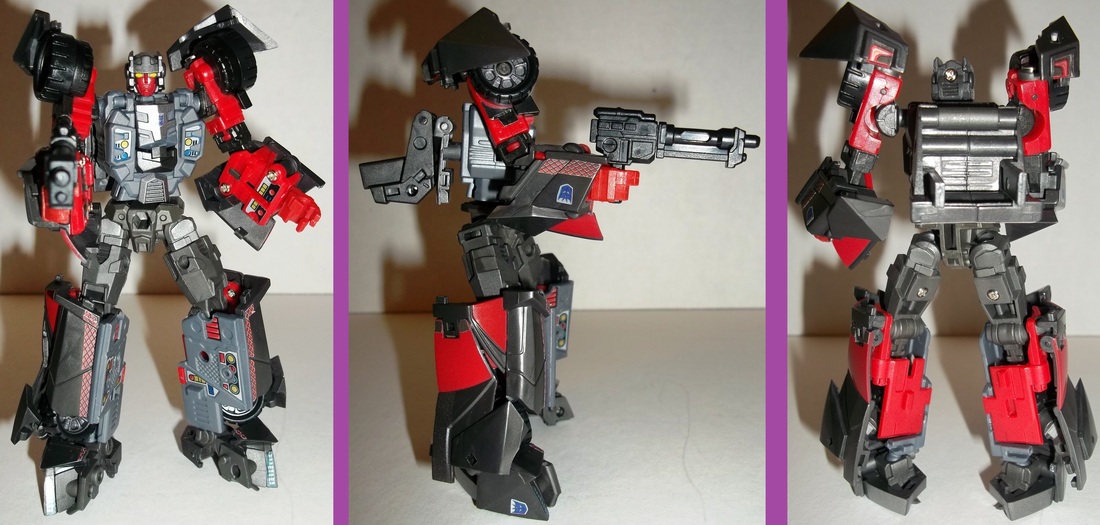
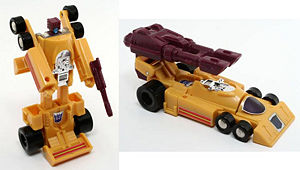
The next figure is Drag Strip, named "Down Force" by Fansproject. If the first two figures were too similar to one another for your tastes, this figure should be quite the relief. Rather then a sports car, Drag Strip is a race car featuring a rather distinctive design. The Fansproject version, although dropping such unique details as a third pair of wheels, is still a rather striking racing vehicle.
|
|
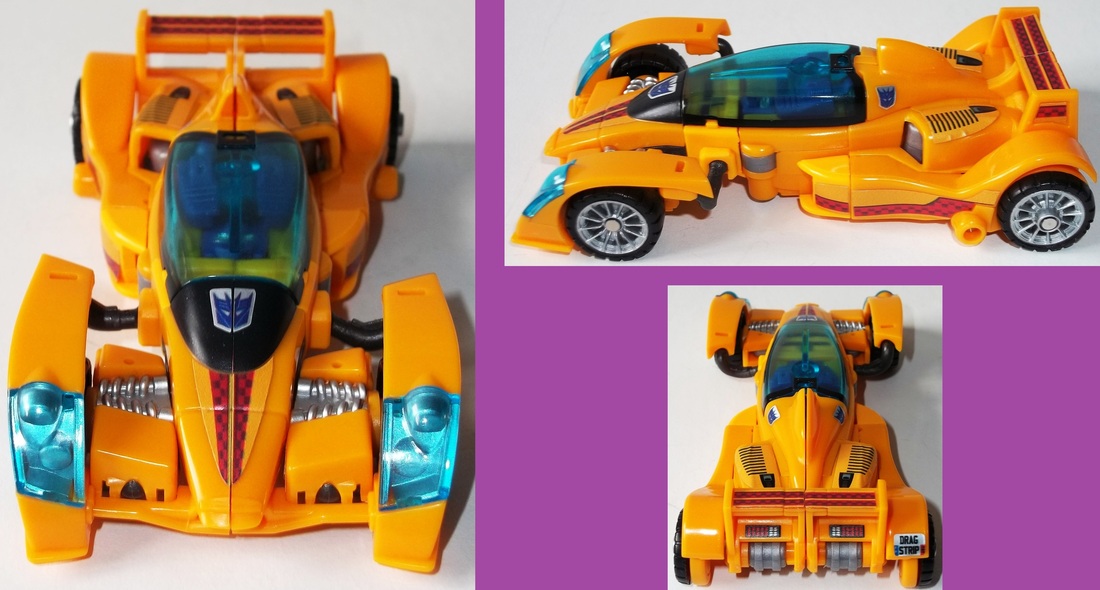
It was mentioned earlier that the figures in this set could be somewhat fiddly. Drag Strip is particularly so. During transformation, the robot mode's feet can be difficult to get out from (or back under) the clear canopy. Particular care should be taken with the canopy, as there have been many reports of it cracking. Indeed, I myself suffered such a crack, even trying to take extra care after hearing of the woe of others. Fortunately the retailer I purchased it from was able and willing to supply me with a replacement piece. When installing the replacement, I left the screw that holds it on ever so slightly loose. I have since transformed it a plethora of times, and have not had it crack again. If you have this toy and the canopy is still intact, but you are worried about making sure it remains so, I might suggest loosening up that screw slightly yourself.
A few of the Reprolabels suffer slightly from being on curved surfaces. Sometimes this is not a problem with Reprolabels stickers, but alas on these ones it can show with slight creases visible where the sticker goes over the curve. Also, especially in photos, the difference between the yellow on the stickers and the yellow plastic is not entirely invisible. It is still close enough that it isn't too noticeable unless you're looking for it, but it does show up more in photos then it does to the naked eye.
A few of the Reprolabels suffer slightly from being on curved surfaces. Sometimes this is not a problem with Reprolabels stickers, but alas on these ones it can show with slight creases visible where the sticker goes over the curve. Also, especially in photos, the difference between the yellow on the stickers and the yellow plastic is not entirely invisible. It is still close enough that it isn't too noticeable unless you're looking for it, but it does show up more in photos then it does to the naked eye.
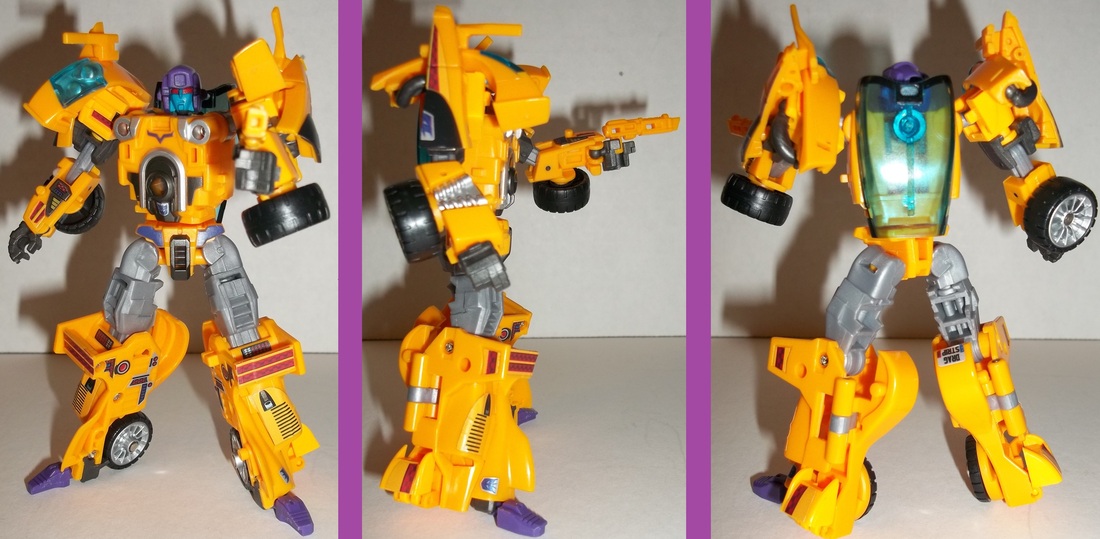
The robot mode is, amongst the five Stunticons, the second most changed from his G1 counterpart. The vehicle mode was rather distinctive, and that detail carries over to the robot mode -- particularly in the shoulder area. However, Drag Strip does still carry over detail from his G1 days, particularly on the chest.
Articulation continues to be excellent. His head is on a ball joint, as are his shoulders. The kibble on his shoulders might seem as if it could get in the way, but it isn't too difficult to move around to accommodate whatever pose you may wish to do. He has swivels in his upper arms, double jointed elbows, and wrist swivels. His waist has a swivel, just take care with the canopy when moving the waist. He has ball joints in his hips, upper leg swivels, and bending knees.
His footprint is a little weak in the back, with the back of it having the round wheel in it. It is helped if you make sure the wheels are locked. (These wheels have slots on them that can slide over tabs to hold them in place.) Still, Drag Strip may have slight difficulty standing in any pose that may lean him back at all. His toes are on ball joints, so that they can be made to remain somewhat flat to the ground once his legs are posed.
Like the others gone over thus far, Drag Strip's sole accessory is his gun, which (even with his gun being particularly tiny) splits in half for vehicle mode storage.
|
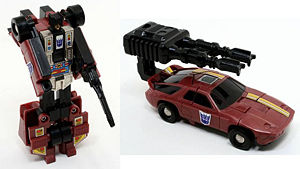
The last of the four smaller Stunticons is, once more, a sports car. Named Dead End, the Fansproject version of this figure was sold under the moniker of "Last Chance." This new version makes for a very good update in vehicle mode, as a rich maroon sports car with an asymmetrical stripe down one side.
|
|
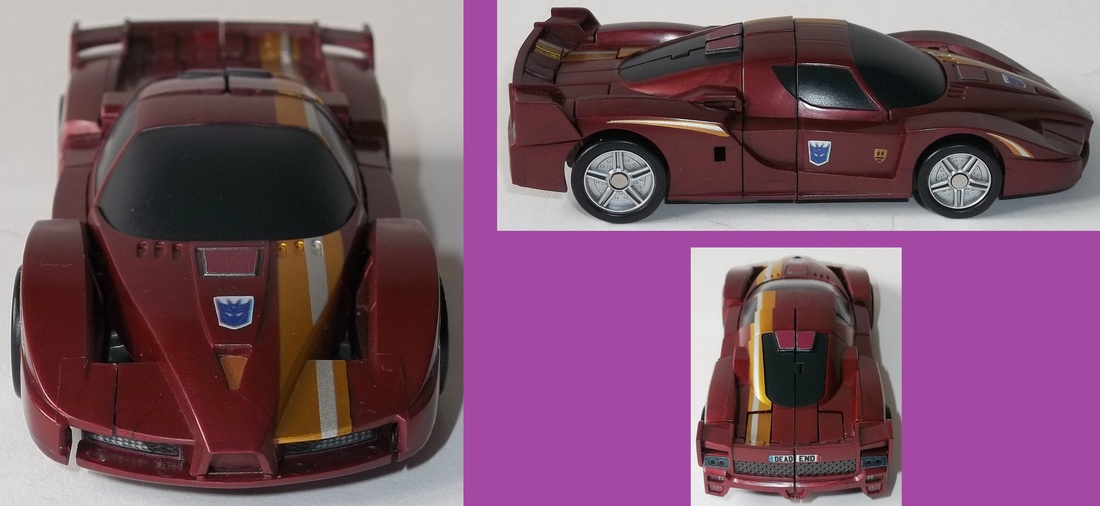
When it comes to the robot mode, Dead End deviates from the G1 look even more then Drag Strip did. In G1, none of the Stunticons had their hoods as their chests, even though that is a very common thing for Transformers robots who turn into cars. This new Dead End, however, has precisely that kind of chest.
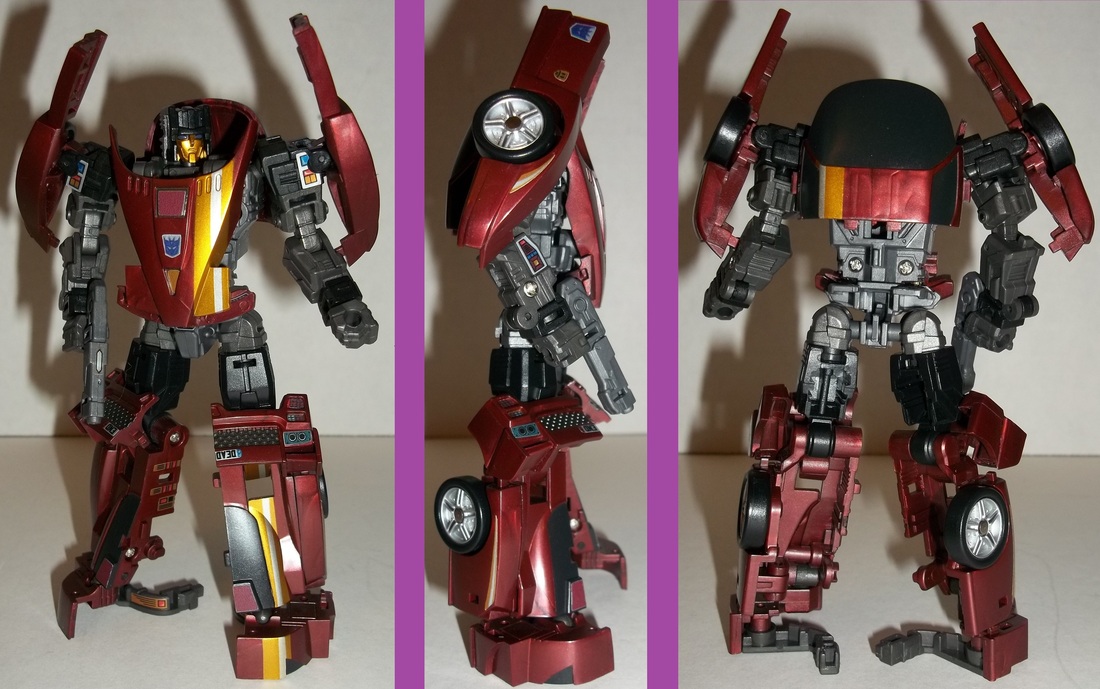
However, Dead End manages to take what could be a very generic look (the ol' hood for a chest / back of the car for legs look) and make it unique and elegant. The way the hood is sculpted gives him a rather sharp collar area, and a tapered look to his body which widens out again at the hips. One note: I often forget one step in his transformation, and looking at the above photos I see I did so when taking the photographs for this review. If you are thinking to yourself, "Man, the backs of his legs look hollow!" that is because, as I have them, they are. But the panel on the side of each leg, which each contain one of the rear wheels, can be folded back to fill this in. If you should happen to forget this step, it isn't the end of the world... unless of course you like to pose your figures on your shelves so that they are facing the wall! Still, it is always nice to know that a figure can look good from any angle, as this one does.
The articulation should sound familiar at this point. Ball jointed head. Ball jointed shoulders. The panels hanging on the outside of the arm should not impede articulation greatly, as they can move if they need to. There is a swivel in the upper arms, double jointed elbows, and a swivel in the wrists. Technically, there is a waist swivel. The bottom of the hood does tab lightly into the waist, however, which would lock it into place. But if you wish to use this joint, leaving the hood untabbed will not be detrimental to anything. Between friction and gravity, everything will still stay where it needs to just fine. As for the legs, there are ball joints at the hips, an upper leg swivel, bending knees, and ball jointed ankles.
Lastly, just like his three predecessors, the only accessory he comes with is his gun, and it can break into two pieces to be stored away in his vehicle mode.
"Hold on a minute," you suddenly say. Or, at least you do if you know anything about the Stunticons from their G1 days. "I'm noticing a patten here. Each of these figures thus far have only come with one accessory... their gun. But aren't the Stunticons supposed to be a combining team? And don't these four form the limbs? What's up? Where are the hands, and the feet?" Worry not, dear reader... We shall get to that! And thus, without further ado, we move on to the leader of the Stunticons, Motormaster!
|
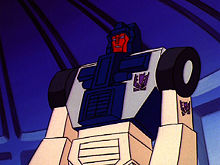
In the G1 cartoon, before the Stunticons, the Decepticons had all been jets or guns or consumer electronics. (Those oh so deadly cameras and cassette players!) Cars had been strictly the Autobots' turf. With the introduction of the Stunticons, the Decepticons were trying to frame the Autobots for evil deeds by having a group of car Transformers committing nefarious acts. So, of course, to make things convincing these "Autobots" needed to have an "Optimus" with them.
|

|
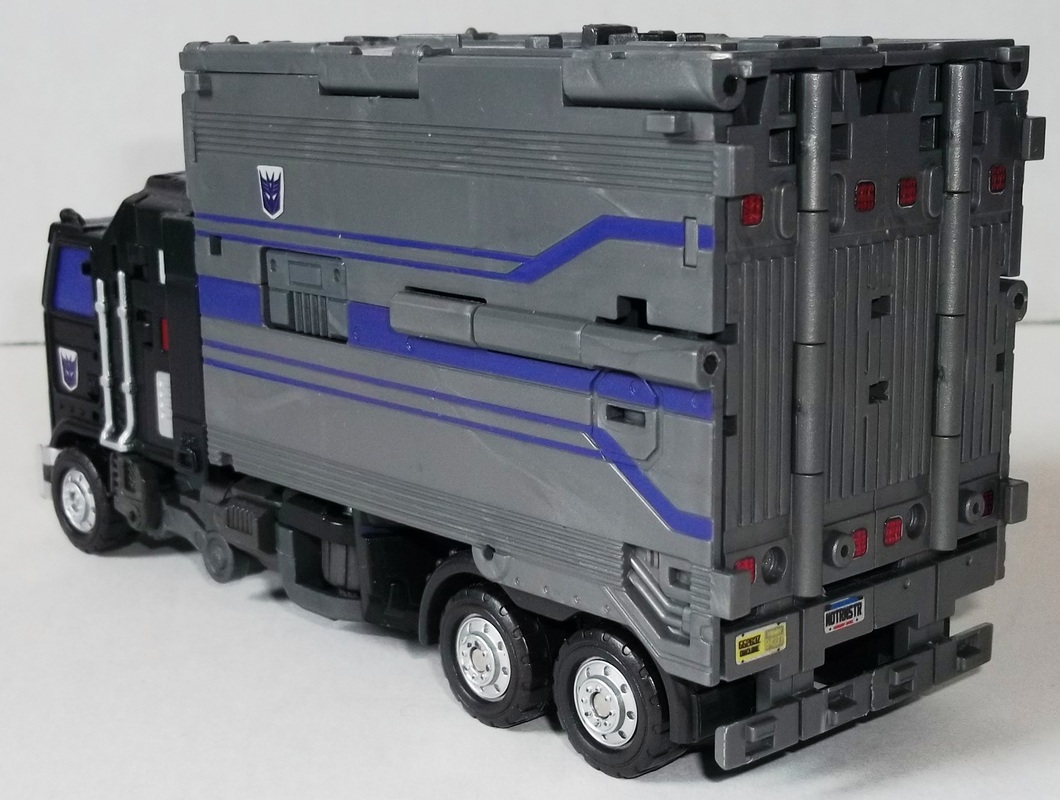
And so we have Motormaster, who in his vehicle mode is entirely convincing as Optimus Prime if you ignore the sleeper cabin, you're color blind, and you can't see that he has Decepticon symbols on him. Oh, those wacky Decepticons, and their foolproof plans! That all being said, Fansproject's Motormaster, sold under the name "Diesel," is a spot on homage in vehicle mode!
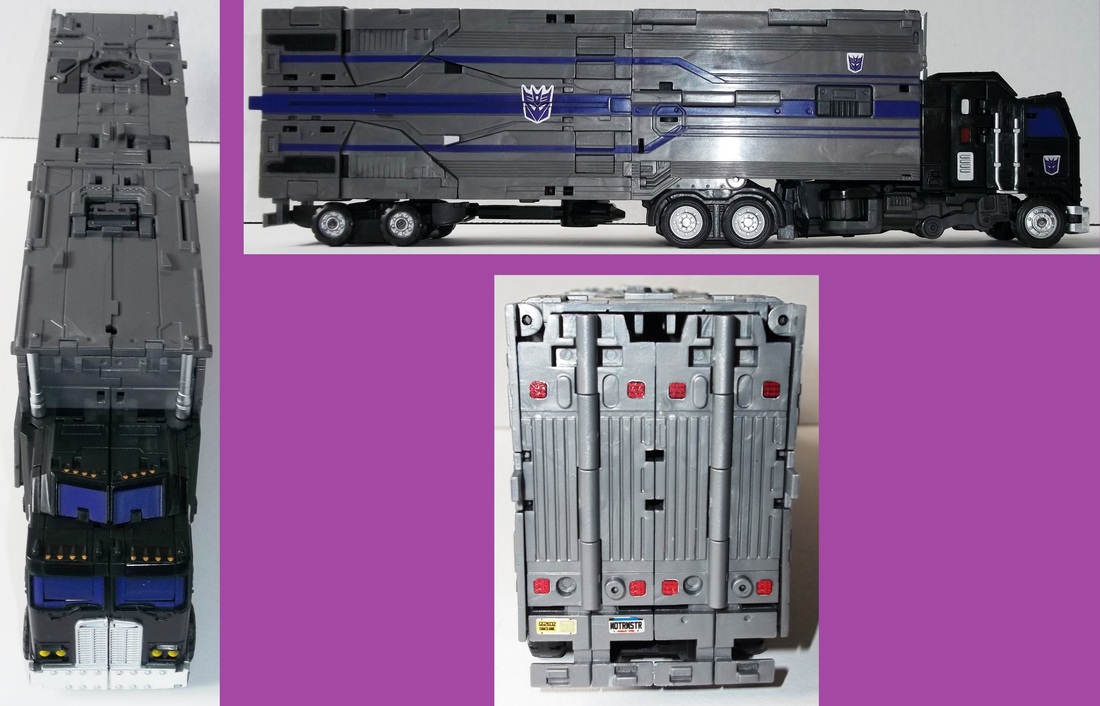
One interesting thing to note about Motormaster's Reprolabels: On this mold, there is a deep and slightly wide indentation on the side right where the large faction symbols on his trailer would go. Reprolabels had an elegant solution to this: The faction symbol is actually made of three separate stickers. As long as you are careful when applying them to make sure everything lines up, it should come off looking quite seamless.
|
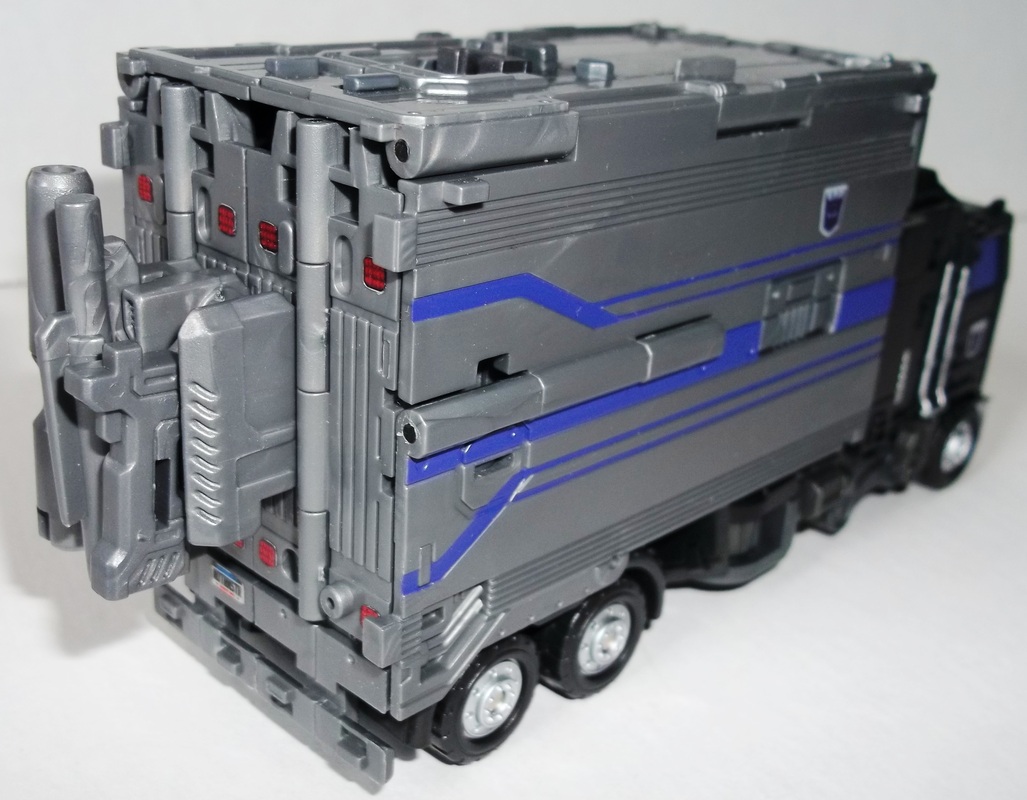
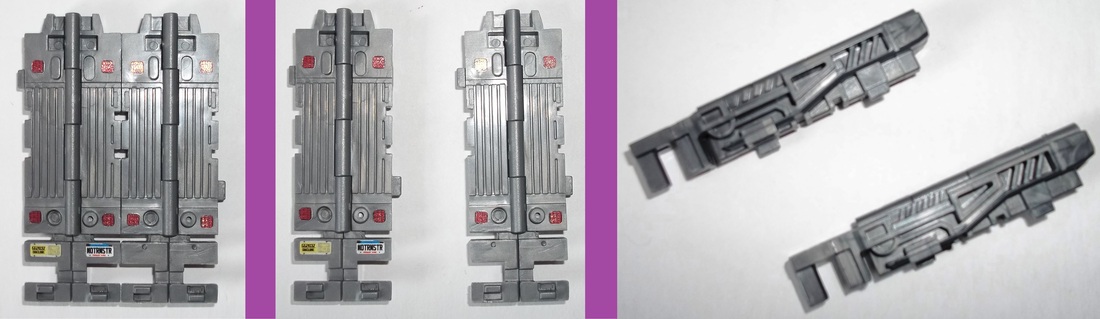
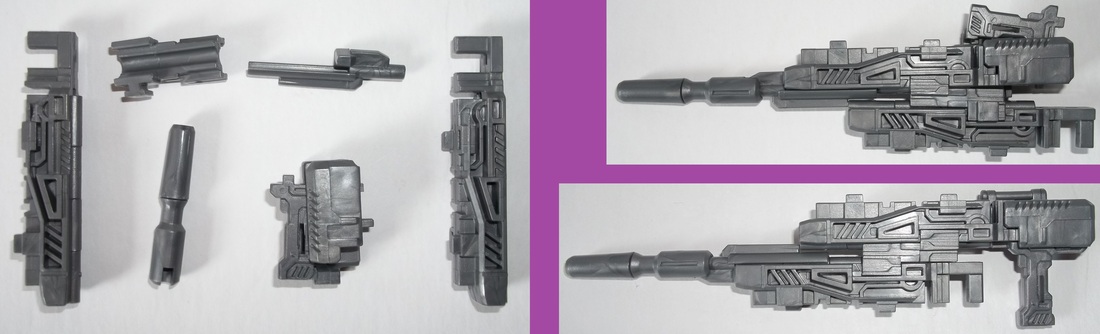
There is, in this entire set of figures, only one bit of kibble that officially kind of is just tacked on in vehicle mode. This small block of parts, which will be important when assembling the gestalt mode's gun, is supposed to be tabbed into two small holes on the rear panel of Motormaster. One way to get around this slight eyesore is, of course, just to take the part and put it aside. Another solution I have found, however, is that it can be tucked into a space between the middle pair of Motormaster's wheels. It isn't a perfect fit. It'll be loose, can rattle around, and may even fall out. But as long as you don't zoom Motormaster around like a flying truck and keep his wheels firmly on the ground, it shouldn't give you any problems.
The retailer I purchased this from included an extra copy of the main piece of this block of parts. It seems that there was a problem with how the part was originally molded which made the gun handle not sit right in the gestalt mode's hand, and this replacement part solved the issue. If you buy this and only get one copy of this part, perhaps you got one that came with the replacement part included... but check the fit to be sure and contact your retailer if need be to see if they can supply the corrected part! |
|
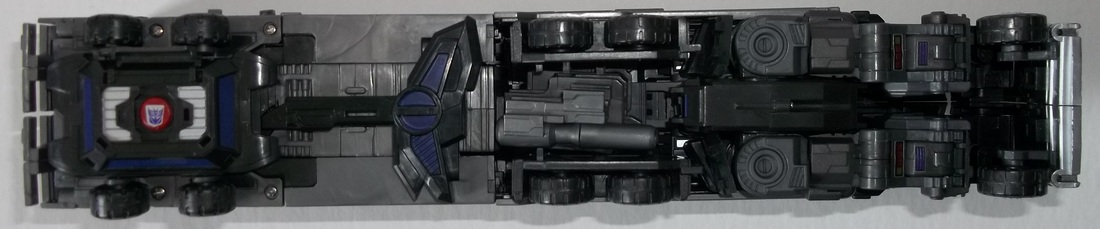
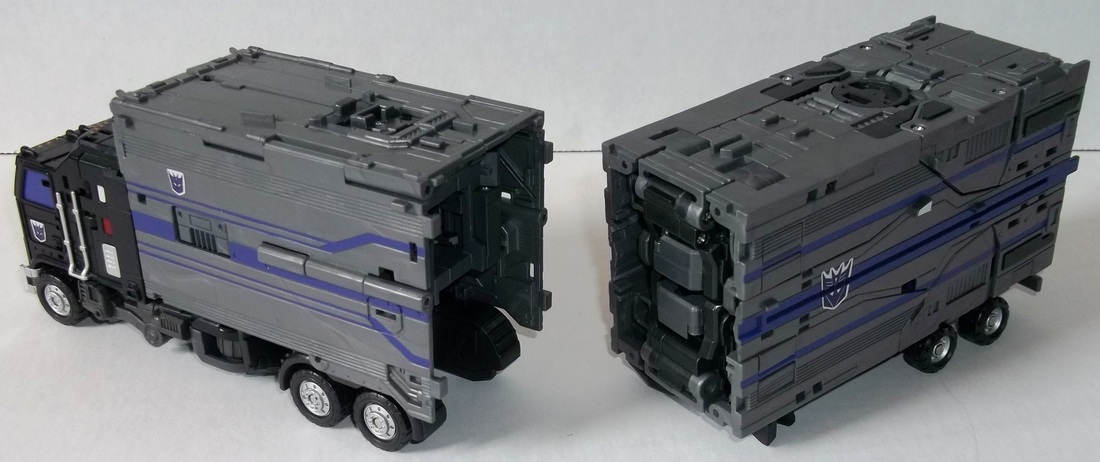
In the G1 days, unlike Optimus whose robot mode was made from just the cab of the truck, Motormaster's robot mode incorporated his entire cab and trailer. (Yet they were still about the same size in robot mode because... Scale issues? What scale issues?) For the Fansproject version, however, the trailer splits in half, and only the cab and front half form the robot mode. We'll set aside the back half for now, and get back to it later. Except for one part: the rear panel of the truck. If you want to have a complete vehicle without the back half, the rear panel can be attached to the back of the front half. This makes Motormaster look more like a local delivery vehicle, or a moving van. As a bonus, it is from the rear panel that Motormaster's guns are made. So if you don't mind a shorter truck mode, with this configuration you can have everything you need for Motormaster as a stand alone character, with no extraneous parts.
|
|
Transforming Motormaster is... interesting. There are lots of tabs on this guy to be aware of. And more notable then his plethora of tabs is his waist. Frankly, his waist assembly is just scary. It has a thin internal structure with multiple tight pieces that take no small effort to move. I've not yet heard of anyone actually breaking it, but doing so can be a real fear when transforming him, especially for the first few times. As it is, however, so far so good. At this point, I feel that as long as you take extreme care when manipulating these parts, you should be fine. Just be careful!
And so now we come to Motormaster's robot mode.
And so now we come to Motormaster's robot mode.
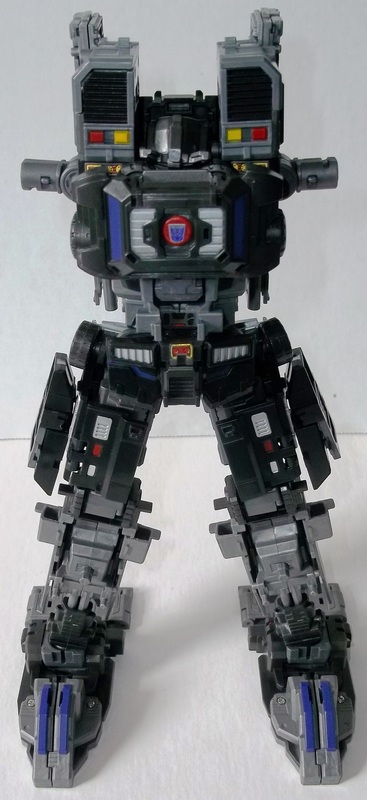
Quite a nice update, I should say. It is far from identical to the G1 toy (or its cartoon equivalent) but it carries over just the right elements to leave no doubt who this is supposed to be. His boxy head is spot on perfect. The cab of the truck making up his lower legs is a great touch that is evocative of the G1 toy, where the cab made up the toy's feet, without giving this new version feet that... well... are ridiculously large.
One small complaint about the feet would be that they cannot be completely flat if you have Motormaster standing with his legs perfectly straight. There is a small tab sticking out of the feet (necessary to tab them into the place they go when forming the gestalt) that prevents this. Fortunately, just spreading his stance slightly fixes this problem, and you should not notice it at all if you want Motormaster in anything resembling a dynamic pose.
There are two unfortunate large panels that hang off Motormaster's back, formed from the sides of his trailer. They swing out of the way quite easily, and stay where you put them, so they should not get in the way too much when posing. But, if you are the sort who is bothered by something like this, and if you are the sort who doesn't mind extra pieces, these are each attached only by a single ball joint and they can easily be popped off and back on. (Indeed, they often pop off anyway during transformation!) I am not overly bothered by them, however, so I just leave them.
For articulation: Motormaster's head is on a ball joint. His shoulders feature a full range of movement. There is an upper arm swivel, but you need to make sure to pull out the large peg in his shoulders (which are used to attach the gestalt mode's arms) by at least one click to free that swivel up. Elbows are double jointed, and there's a swivel at the wrist.
Things get a bit more interesting on his lower body. His waist, his hips, upper leg swivel, and his knees are all ratcheting joints, and most of them are quite strong ratchets at that. Many of these joints end up serving the same purpose for the gestalt mode, and so they need to be able to accommodate the weight of the full figure and still hold their pose. Even keeping that in mind, however, the strength needed to move the joints can feel like overkill when just playing with Motormaster by himself. Finally, his feet are on ball joints.
If using the short truck, Motormaster's only accessories are decently sized a pair of guns. But wait... What about the rest of the truck? What's up with that?
|
Well, if we take the leftover bit of truck and pull it open... Congratulations! You found all of the extra bits you need to form the gestalt mode! But what if you are the sort of person who likes to have a use for every piece in every mode? Is there any way for Motormaster to use this stuff as an individual robot?
Why yes, there is! But before we get to that, let us have some fun with some weapons. First, if you take Motormaster's two guns, and that extra block of parts described earlier, you can make one huge gun! This large gun can be assembled two slightly different ways, one that leaves a handle of the size for Motormaster to hold, and the other with a handle sized for the gestalt. |
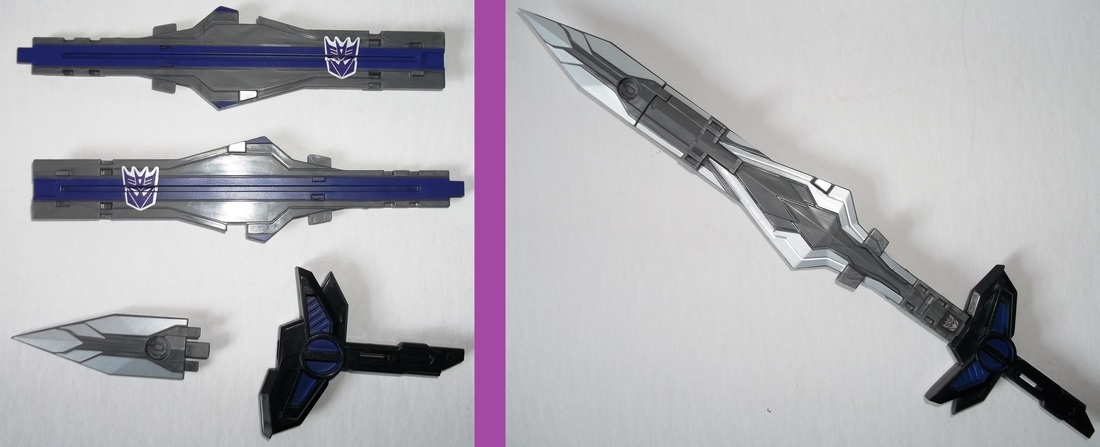
Secondly, if you take the side panels of the back half of the truck, the pointy thing from inside the back half of the truck, and the handle-y thing that until now has been tabbed onto the bottom of the truck, and assemble that all together, you get a huge freaking sword! Alas, this sword cannot be wielded by Motormaster. But, if you are indeed keen on using every piece, you will want to keep this sword handy. (More on that in a moment.)
|
|
So, once you've done that, you still have a bunch of left over back-of-the-truck bits. What now? Well, pull everything apart, reconfigure things a bit, and they make huge-arse weapon emplacements to attach to Motormaster!
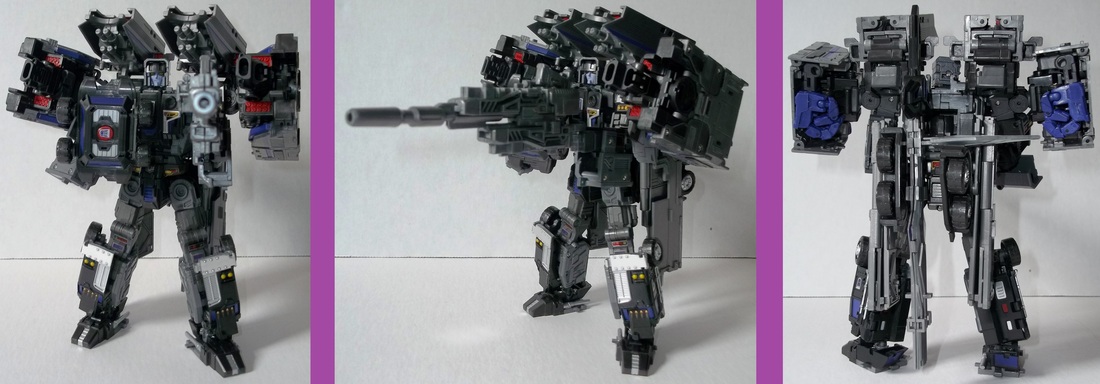
It can be fiddly (There's that word again!) getting that all attached, and getting him into a good pose once it is all attached, but after all is said and done, if you must use everything it doesn't look too shabby. This is certainly one well armed Motormaster!
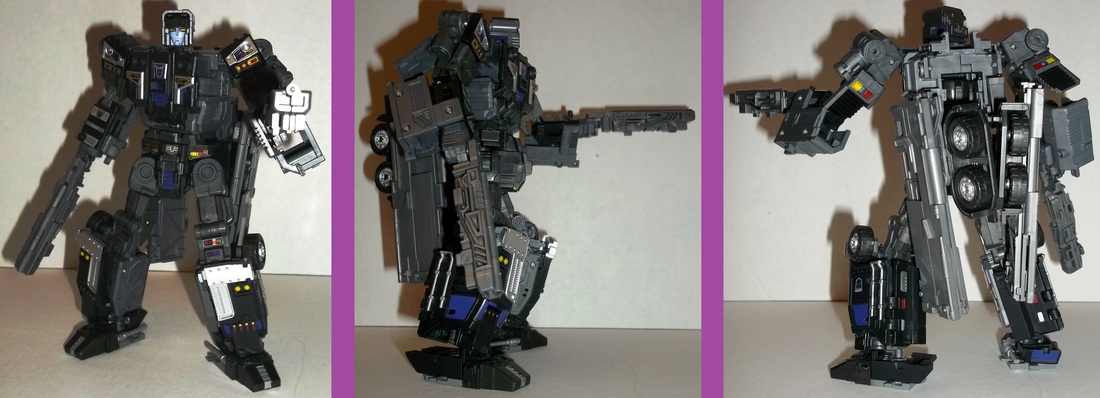
As for the sword, you may notice it on his back. If you don't mind leaving it off, it may be simpler to do so. After all, the only reason there is to attach it is so you can say you used all of the parts. Officially, the instructions have it attached in a way where it points up and sticks way up over the top of Motormaster. Frankly, it looks silly that way. I found a way to attach it pointed down instead. You just have to pull off the tip, but you can then wedge the tip perpendicular to the rest of the sword, plugging it into the slot opposite the slot the sword itself is plugged into Motormaster by. It works, and is nearly invisible from angles that don't look directly at the back. (It is attached in all three of the immediately above images.)
The G1 Motormaster had a base mode. I have seen some attempts, of varying success, at fan-made base modes using this toy. Frankly, however, I always saw that as an unnecessary mode. (Unless you're a city-bot, what's the point of a base mode that doesn't leave behind a robot to go with it?) But if you insist on having three modes since the G1 toy had three modes, I suppose this armored up version of Motormaster could give you your third mode fix! (Heck, you can argue four modes, since you can make two different trucks with him. But personally, I think that's stretching the definition of "mode.")
Well, that's everybody! I think these are great toys, at least for adult collectors. (I would not trust a child to not break these just by looking at them funny!) Once you get used to the transformation, they are fun (even if still a bit scary in a few spots) to play with. They look good individually, and as a group, being a superb update to the very popular team of the Stunticons.
But wait... there's more! We're not done with this review yet, because of course the Stunticons are a combining team! We still have to take a look at their gestalt mode!
|
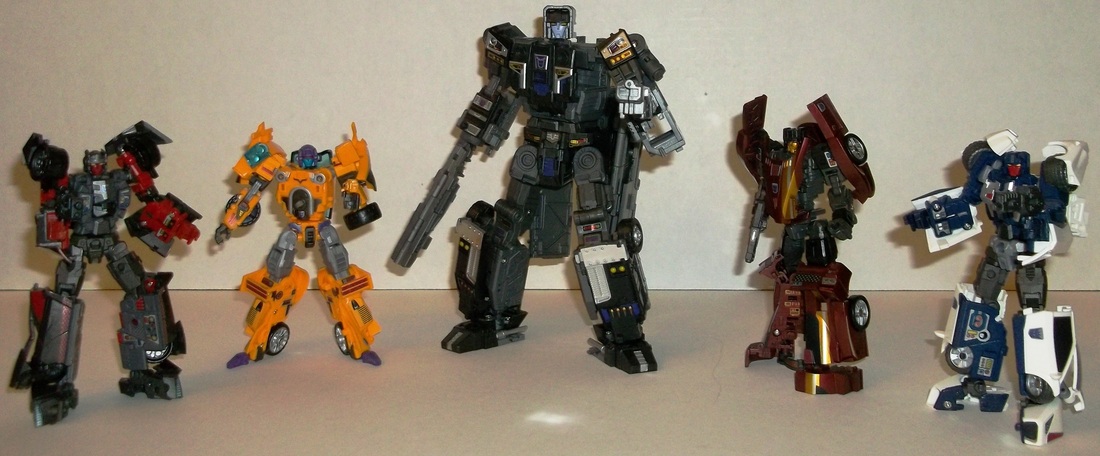
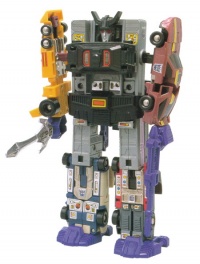
G1 Menasor was a "Scramble City" type combiner, with Motormaster making up the body and the other four each capable of making any of the limbs. That being said, the limbs tended to have a common configuration, with Drag Strip & Dead End as the arms, and Breakdown & Wildrider as the legs.
|
|

|
While transforming Motormaster to form the gestalt while taking photos for this review, I stumbled upon what I'm presenting in the photo to the left. I call him... Big Headed Motormaster! (Just ignore that his hands are on backwards, and everything will be fine.) Nothing I'll ever intentionally do again, just thought I'd include it here as a laugh.
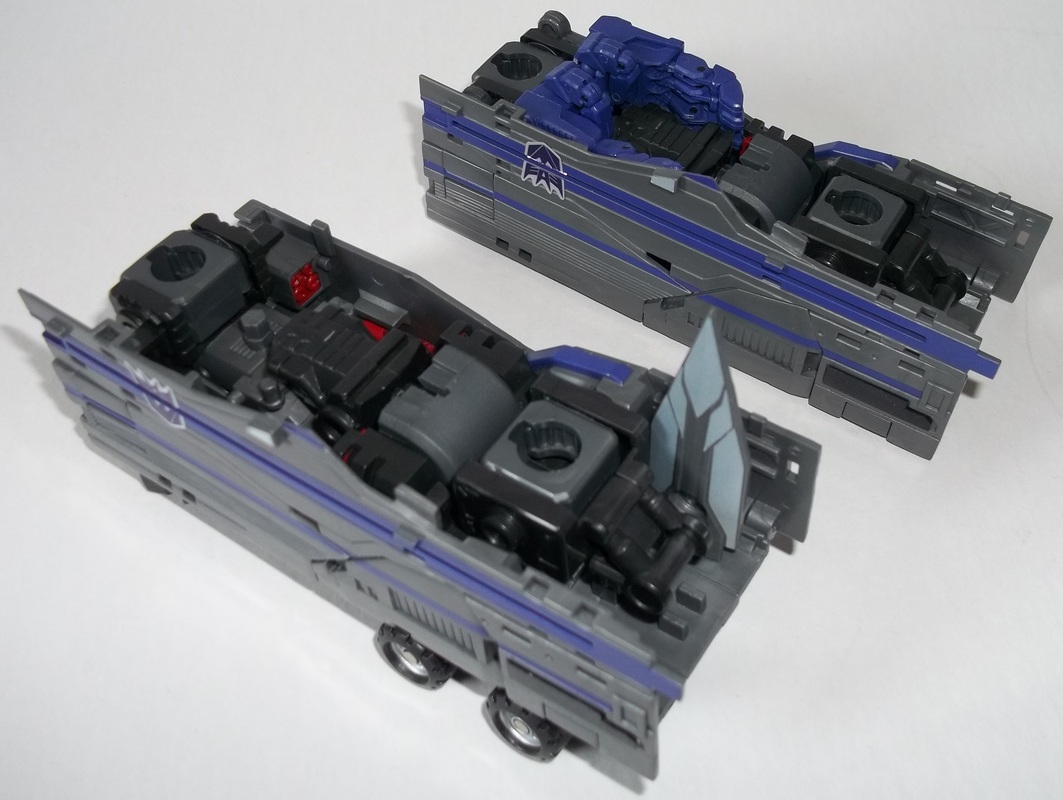
To the right, you see Motormaster in all his torso-ish glory, ready to combine with everyone else. "Hold on," you might say, "Why does he already have lower legs and feet? Shouldn't he need to combine before he can have those?" Well, typically for a combiner, yes. So on the surface, this may seem an odd design choice on the part of Fansproject. But if you stop and think about it for a moment, and consider how thin legs made from those sports cars would be, you might see how that would make for a weak looking gestalt, yes? |
|
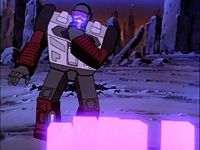
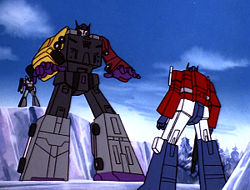
Besides which, if you look at the picture from the cartoon above, you'll see this isn't entirely inaccurate, the big difference being that in the cartoon, the cars attached to the rear of the legs, and here they'll do so on the front. But this is a change I approve of, as otherwise we'd be hiding two members of the team in the gestalt, and that would be just silly. We want to see all five Stunticons together, forming Menasor in all of his glory.
So, shall we see exactly how glorious he is?
So, shall we see exactly how glorious he is?
Pretty damn glorious.
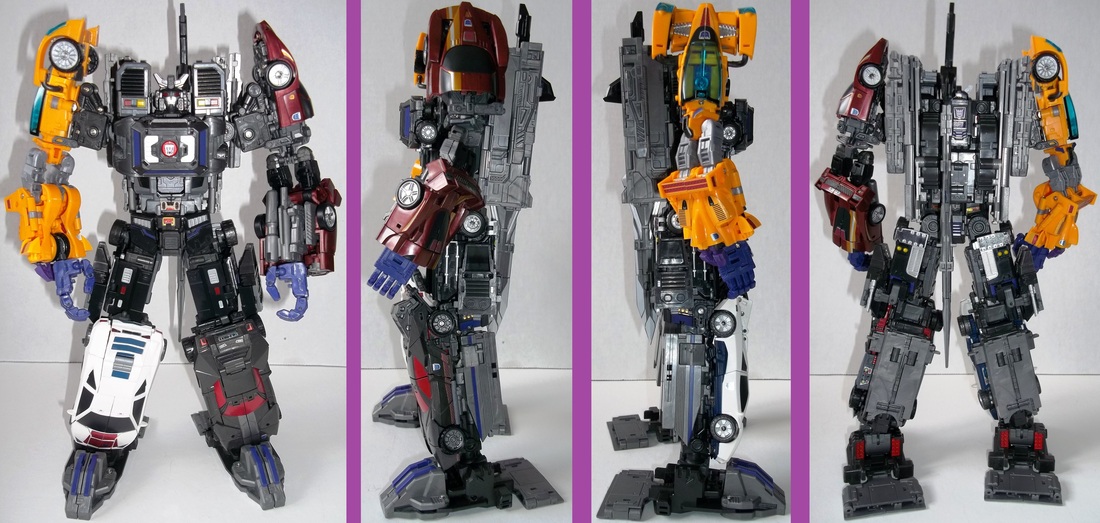
The two flaps that were on Motormaster's back remain on Menasor's back, but now they have a place to tab in and don't really stick out at all. In fact, overall Menasor is pretty kibble free, beyond what is necessary for his look. On other robots, for example, having the head surrounded by a large block of plastic jutting up from each of the shoulders would be rather annoying, but if you look at his G1 toy it actually captures the look of it quite nicely while updating it and adding articulation.
The aforementioned two flaps on his back provide some of the weapon storage. The large rifle has to be stored disassembled, and the two smaller guns that help form it tab onto the outsides of these flaps. Meanwhile, the sword can tab onto either flap on the inside. The rest of the gun, reassembled into the previously discussed chunk of parts, can tab onto the forearm made from Dead End.
All of the smaller robots handguns can remained stored on the gestalt, mostly staying out of sight. It is just nice to know you can have no left over pieces.
|
His articulation is excellent, not only in where his joints are, but also in the overall implementation of it. His head is on a ball joint. His shoulders rotate on ratcheting joints, and have additional outward motion that is also on ratchets. There's an upper arm swivel and double jointed elbows. The wrists can swivel, but may be impeded slightly by some of what surrounds them. (You may need, to achieve some poses, to pop off the fist and reattach it orientated how you'd like it. Personally, though, I haven't had too much difficulty getting satisfactory poses without doing that.)
His hands themselves are excellent, with two joints in each finger including the thumb. There is a ball joint at the base of each finger, and a pivoting joint at the mid knuckle. You can get a lot of great poses out of them. Also, there is a tab on each palm that will slot into his weapons to hold them securely. |

|
As we move on to Menasor's lower body, some of what felt excessive on Motormaster now feels just right. His hips ratchet in any direction they need to, with ball joints in his crotch plate to help moved it out of the way if need be. There's a ratcheting upper leg swivel, ratcheting knees, and both a ratchet and a tight ball joint in each of his ankles.
All of the joints in his hips and legs are very good at supporting the full weight of Menasor. And special mention needs to be made of his feet. They are nice and wide, with such good articulation in the ankles they can almost always be placed flat. Additionally, the feet actually have some non-slip bits built into the bottom of them. This, plus the tight joints in the legs, means that you can put Menasor into any number of poses where he is putting more of his weight on one leg or the other, and where he is not entirely symmetrically balanced, without worrying about him slipping or falling over. This all makes for a large and heavy figure who can pull off some great poses I wouldn't trust a figure half his size or weight with!
All of the joints in his hips and legs are very good at supporting the full weight of Menasor. And special mention needs to be made of his feet. They are nice and wide, with such good articulation in the ankles they can almost always be placed flat. Additionally, the feet actually have some non-slip bits built into the bottom of them. This, plus the tight joints in the legs, means that you can put Menasor into any number of poses where he is putting more of his weight on one leg or the other, and where he is not entirely symmetrically balanced, without worrying about him slipping or falling over. This all makes for a large and heavy figure who can pull off some great poses I wouldn't trust a figure half his size or weight with!
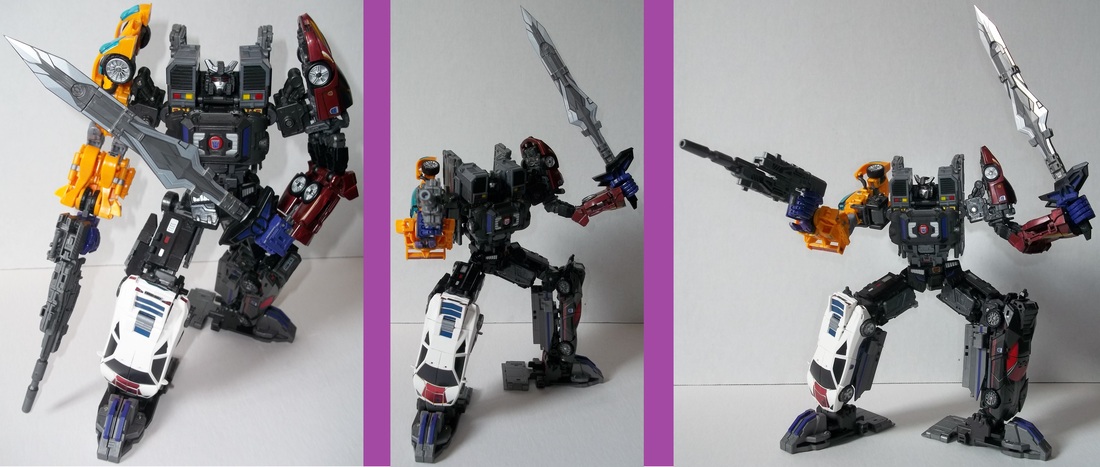
When you have his gun assembled, with the chunk of it that was stored on the arm made from Dead End removed, it would leave an unsightly hollow gap on that arm. But fear not! Remember those panels I forgot to fold over on Dead End's legs as discussed above? Folding them over now will fill in the empty space on his arm. The end result does make that forearm look a little flat, but it isn't too distracting and is certainly better then what you would have if you left that space open.
Remember how I mentioned that with the G1 toy, any one of the smaller robots could form any one of the limbs? Yeah, this toy can do that, too:
Remember how I mentioned that with the G1 toy, any one of the smaller robots could form any one of the limbs? Yeah, this toy can do that, too:

It would, of course, be easy enough to swap one arm for the other, or one leg for the other, and you can do that. But Fansproject went the extra mile and made it so that you can swap the arms for the legs, and vice versa! Sadly, the execution of this feature could have been pulled off a bit better. When swapping arms and legs, the connections of the smaller robots to the main body of Menasor are much looser, making for a gestalt that you can't as much pick up and play around with. When you do this, Menasor becomes much more of a, "find a pose you like, carefully get everything just so, walk away, and hope for the best" sort of figure. Less of an issue but worth note is that you'll have to keep the large gun assembled when utilizing this option, as you have lost the parts storage that would have been on the Dead End forearm. So overall, a bit of a disappointment with the implementation of this feature, but they didn't have to include this option at all so it is nice that they even tried. And frankly, for every day display I'm more likely to have him in his standard configuration, anyway.
I will note that there is almost no loss of articulation in this configuration. The feet may loose a tiny bit, only from how the different cars fit into the shared space, but that's about it.
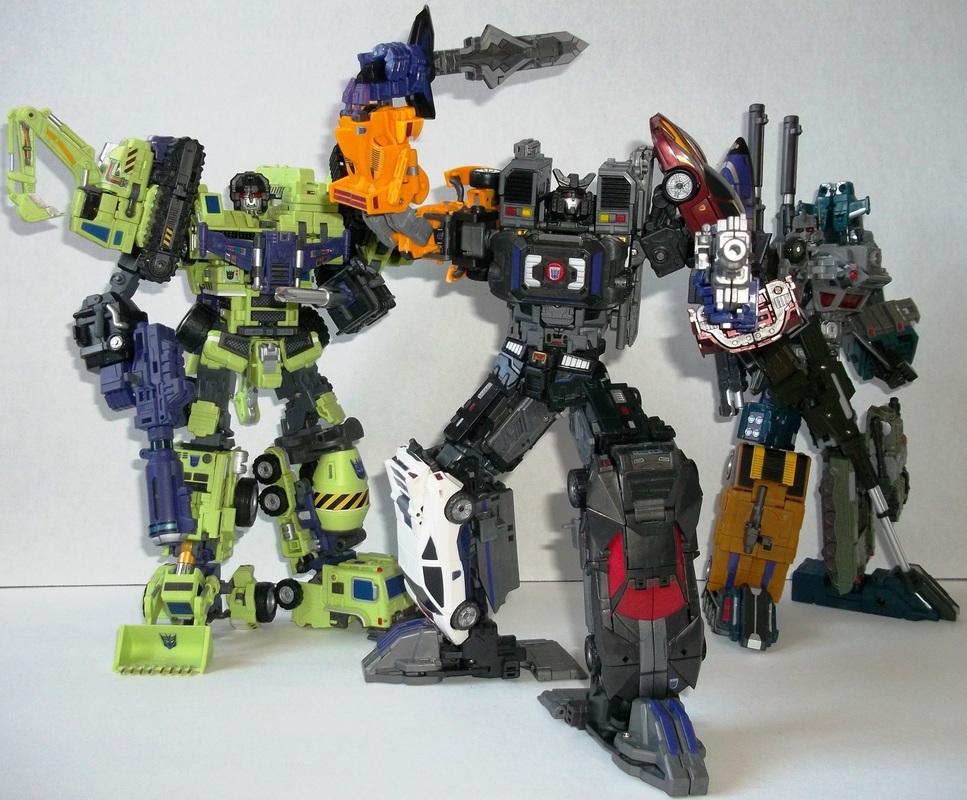
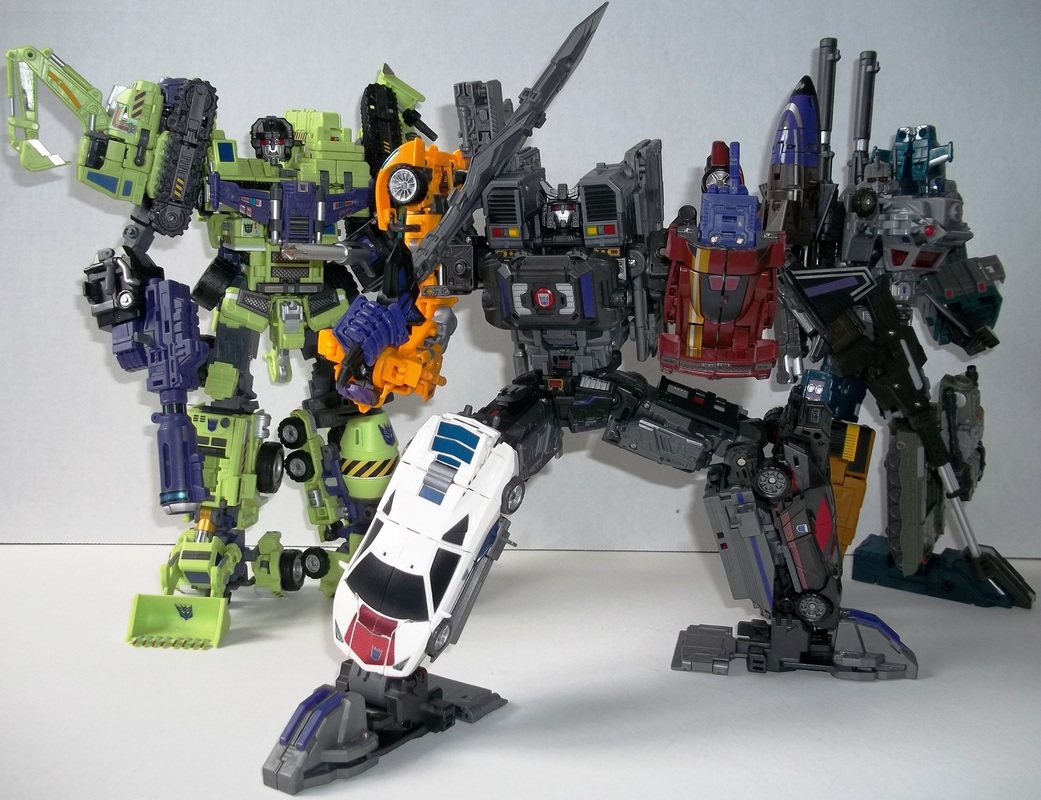
Moving on, here are a few photos of him hanging out with Devastator and Bruticus because, why not? If you look closely at Bruticus in the background, you may notice he has Reprolabels on him that he didn't at the time I reviewed him. I may in the future take some closer photos of this to show off.
I will note that there is almost no loss of articulation in this configuration. The feet may loose a tiny bit, only from how the different cars fit into the shared space, but that's about it.
Moving on, here are a few photos of him hanging out with Devastator and Bruticus because, why not? If you look closely at Bruticus in the background, you may notice he has Reprolabels on him that he didn't at the time I reviewed him. I may in the future take some closer photos of this to show off.

(Why is there the compulsion, with any figure that has the hand articulation to pull it off, to eventually have it make that particular gesture?)
One small note, just a small disappointment. Menasor's chest plate, that is also a shield in the hand of the armored up Motormaster? On the G1 toy, that could roll around as its own little car when Menasor was not combined, giving Motormaster a little buddy kind of like what Optimus had with Roller. Here, however, there is a tab (used to plug the car onto Menasor's chest, or on Motormaster's undercarriage where he is the truck mode's rear wheels) that sticks out and prevents it from touching the ground properly. It will roll if flipped upside down, but then you have all of its unsightly bits showing. This is far from the end of the world, but as someone who as a child owned the G1 toy and remembers this function, it is as stated a small disappointment that that has been lost.
One small note, just a small disappointment. Menasor's chest plate, that is also a shield in the hand of the armored up Motormaster? On the G1 toy, that could roll around as its own little car when Menasor was not combined, giving Motormaster a little buddy kind of like what Optimus had with Roller. Here, however, there is a tab (used to plug the car onto Menasor's chest, or on Motormaster's undercarriage where he is the truck mode's rear wheels) that sticks out and prevents it from touching the ground properly. It will roll if flipped upside down, but then you have all of its unsightly bits showing. This is far from the end of the world, but as someone who as a child owned the G1 toy and remembers this function, it is as stated a small disappointment that that has been lost.
|
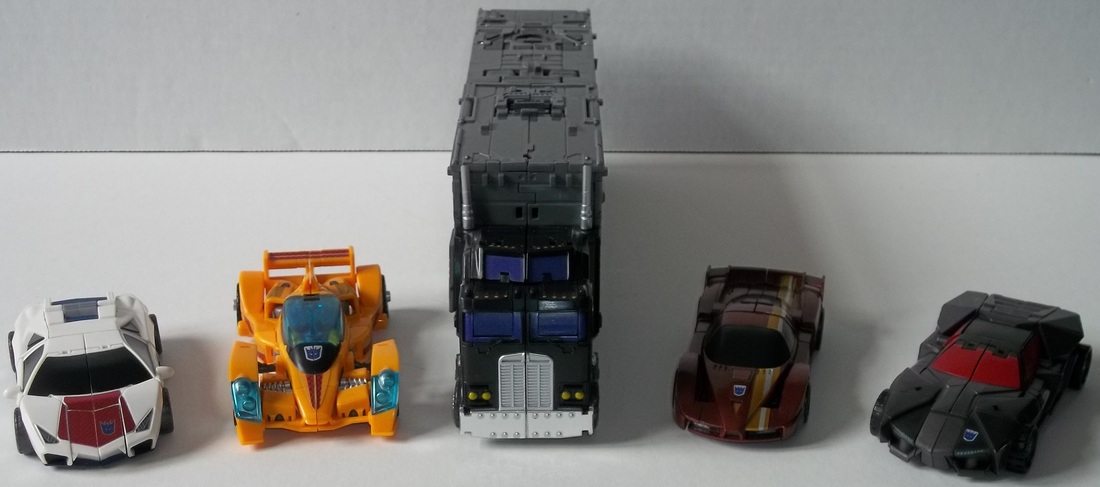
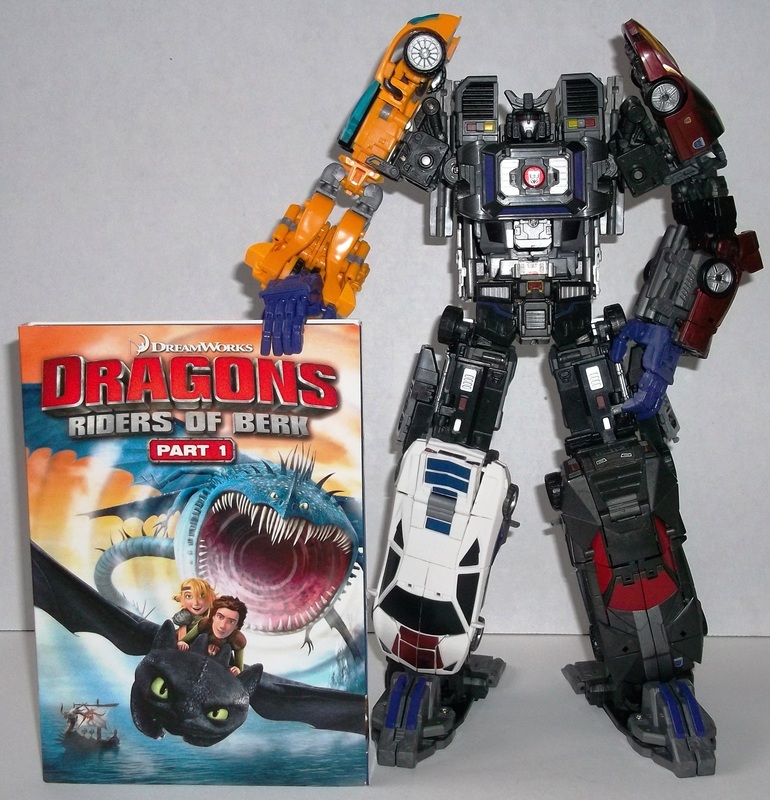
Well, time to start wrapping things up, so here is the customary shot of the figure just reviewed posing with a standard height DVD case for size reference. Not often that the figure being reviewed is able to hold up the DVD!
Anyway, as stated earlier in my review, this is not a toy for kids. They will break it into a million pieces, and there will be much crying and disappointment. For that matter, if you are a careless adult, this is also not for you. You will break it into a million pieces, and there will be much crying and disappointment. That all having been said, if you are the sort who can take care while playing with this, take it slow when first transforming him until you get the feel for it, maybe even watch a video before touching it yourself to watch someone else going through it, this is a great Menasor! I know I've stressed how careful you should be with this set, but once you have the feel for it, it is a joy to transform, to pose as individuals or as the gestalt, and to have on the shelf. (Especially if you have a few of his gestalt friends for him to hang out with!) I would give this set of figures a very hearty recommendation! |
Review added 4 July 2014 by Yotsuya. Comments are welcomed!
