
Review #4: Reveal the Shield Deluxe Class Optimus Prime
("Classics Deluxe Class Generation 2 Laser Optimus Prime")
with Maketoys Battle Tanker Trailer
My first three reviews were for two toys that are pushing six years old, one of which had a third party accessory that had been around for a little while, and another toy that was a third party offering that while not very old might not any longer be breaking news to people. This effort might be my first offering that, as they say, is striking while the iron is hot with a toy that came out last year (and for quite a while was tough to find, the last live action movie pushing it from major chains into discount stores) with a third party offering that only came out last month. So enjoy the review as we take a look at it!
|
This review brings us something similar to my first review for this site, except instead of being a Classics style update of the original Generation 1 Optimus Prime, this figure does the same thing for the Generation 2 Laser Rod Optimus Prime. Strictly speaking, this is not a Classics release. This is a much more recent figure and, officially, the Classics line is long over. However, succeeding lines such as Universe 2.0, Generations, and (the line that this figure is from) Reveal the Shield have all contained figures that were obvious successors to Classics and in my mind are prospective members of the Classics line.
More similarity to my first review can be found in some of the alterations to this figure. Again, the front cab is an official Hasbro product and the trailer is a third company product. Again, there are Reprolabels. And again, there's a bit of silver Sharpie work here. |

|
|
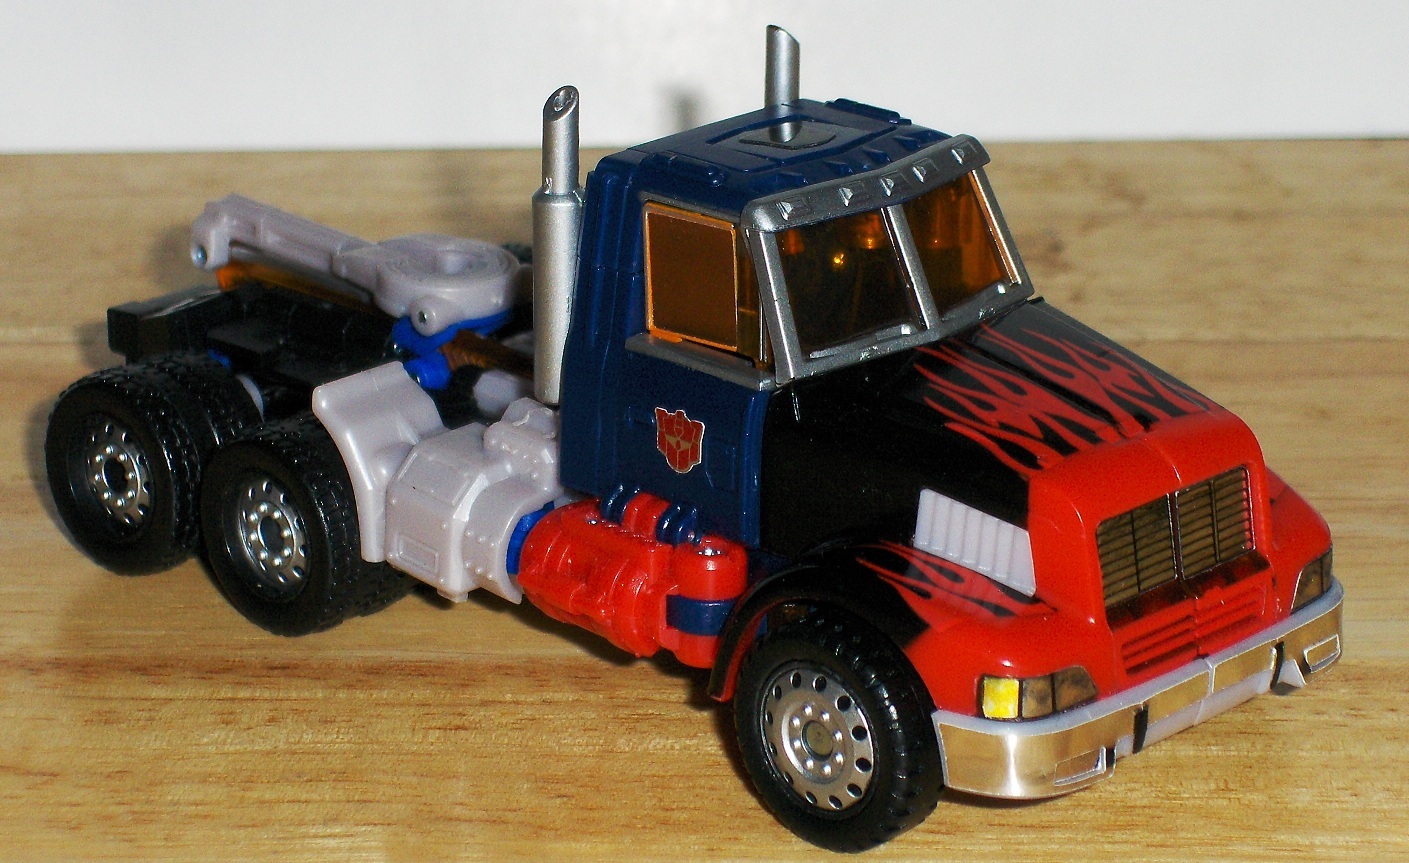
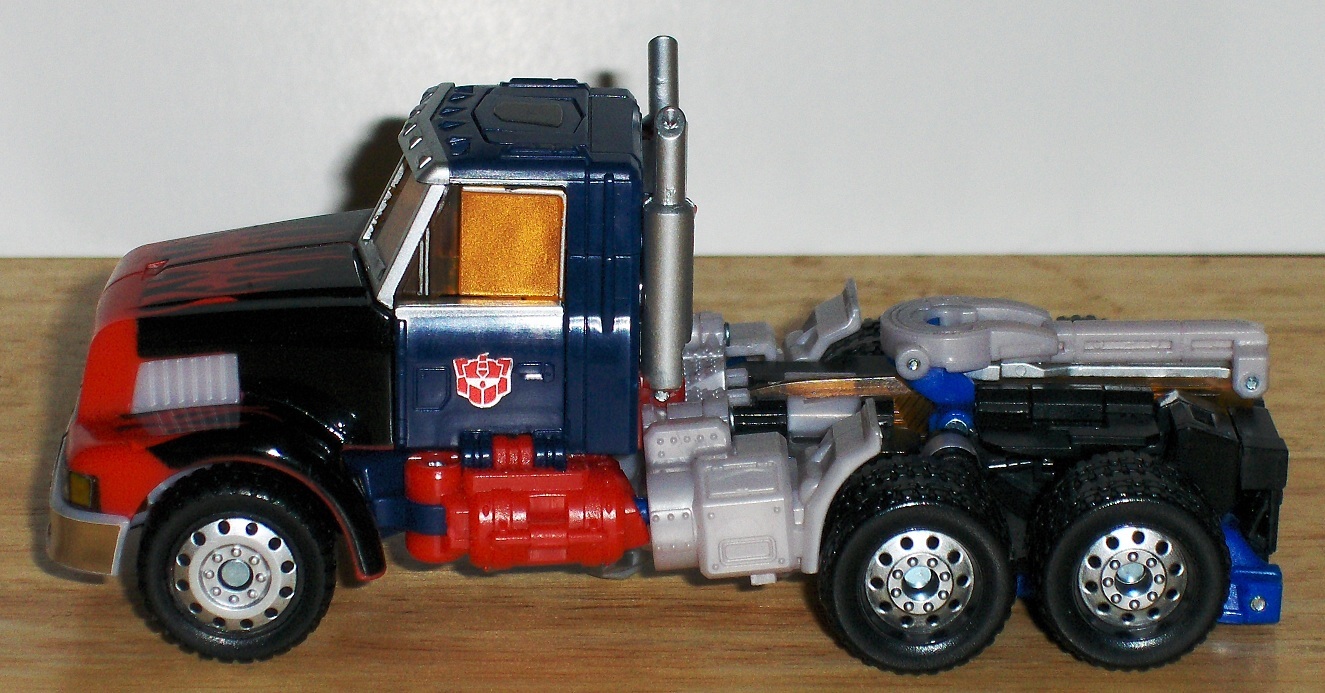
Let us take a look now at the cab. An excellent update of the G2 toy. This mode can be a bit fiddily to get to stay together, though. The panels have to be together just right for the driver's compartment to look right, and shifting one into place can cause another to slip out of place. Also, the grey plastic piece just behind the driver's compartment (the piece that sits right in front of the rear wheels) seems to just not quite want to cooperate with sitting right in this mode. Still, if you're an adult collector just looking for a piece to sit on your shelf, once you get it looking good it should be fine. As far as children go (and as a much more recent toy, it is one that as of this writing you still might have a chance to find in stores), I suppose that while some might not care other kids may get annoyed when pieces don't quite go where they want them to when they play with this toy.
|
The silver sharpie work in this mode... well, it was very subtle. To the point where it seems to not even be terribly visible in photographs. It was just a slight touch to the two raised lines of plastic on the top of the cab to either side of the panel that you will later see the robot's head folds out from. The Reprolabels do cause much more promanant cosmetic changes to this mode. They include the chromed grill, the chromed bumper, the headlights,the tail lights, and the side windows. As released by Hasbro, the figure had orange painted side windows. (In photos, you can still make out a bit of the orange around the sticker, but while it is there if you look for it, it is less obvious in person.) Reprolabels provided stickers to help the side windows better match the amber colour of the clear plastic of other windows.
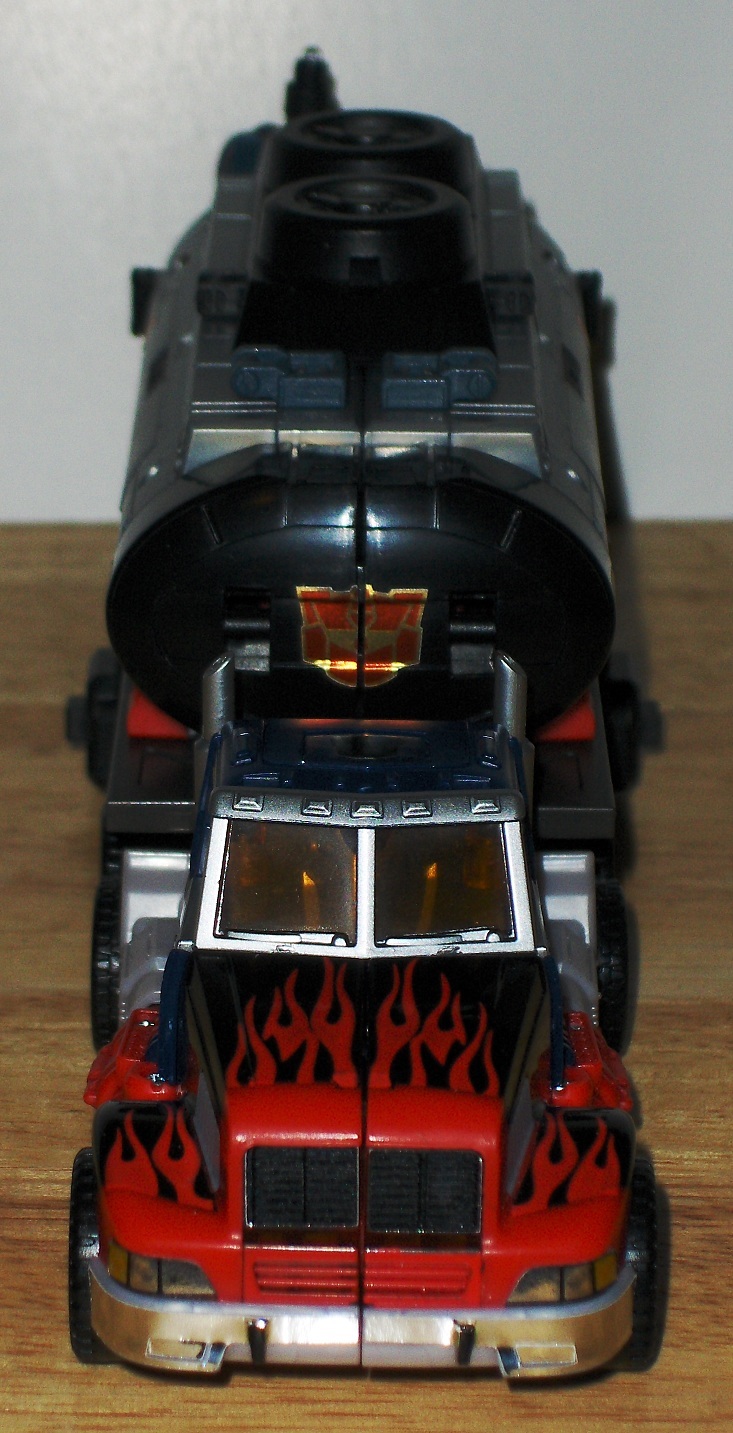
Faction symbols. Generation 2 had unique versions of both Autobot and Decepticon faction symbols. I must admit I have never been a fan of them. I typically avoid using them when possible. One exception to this is my reissue G2 Prime (don't have an original, alas, but I am content with the reissue and will likely review it here for you someday) which has the faction symbols tampo-printed on the figure. I suppose if I really wanted, I could have covered them with stickers of normal faction symbols, but I decided to leave well enough alone. As far as this figure, Reprolabels did provide options for either faction symbol. While generally I dislike the G2 ones, I ended up using them here in a measure of solidarity with the figure that inspired it.
As a figure in the Reveal the Shield line, much like most of the original Classics line the only faction symbol that this figure innitially had was in the form of a rub sign on the top of the cab. Unlike G1 or Classics rub signs, however, this one was form cut to the shape of the symbol, rather then featuring the square shaped grey border of past rub signs. The "shield" that is revealed is a standard Autobot faction symbol.

|
|

|
|
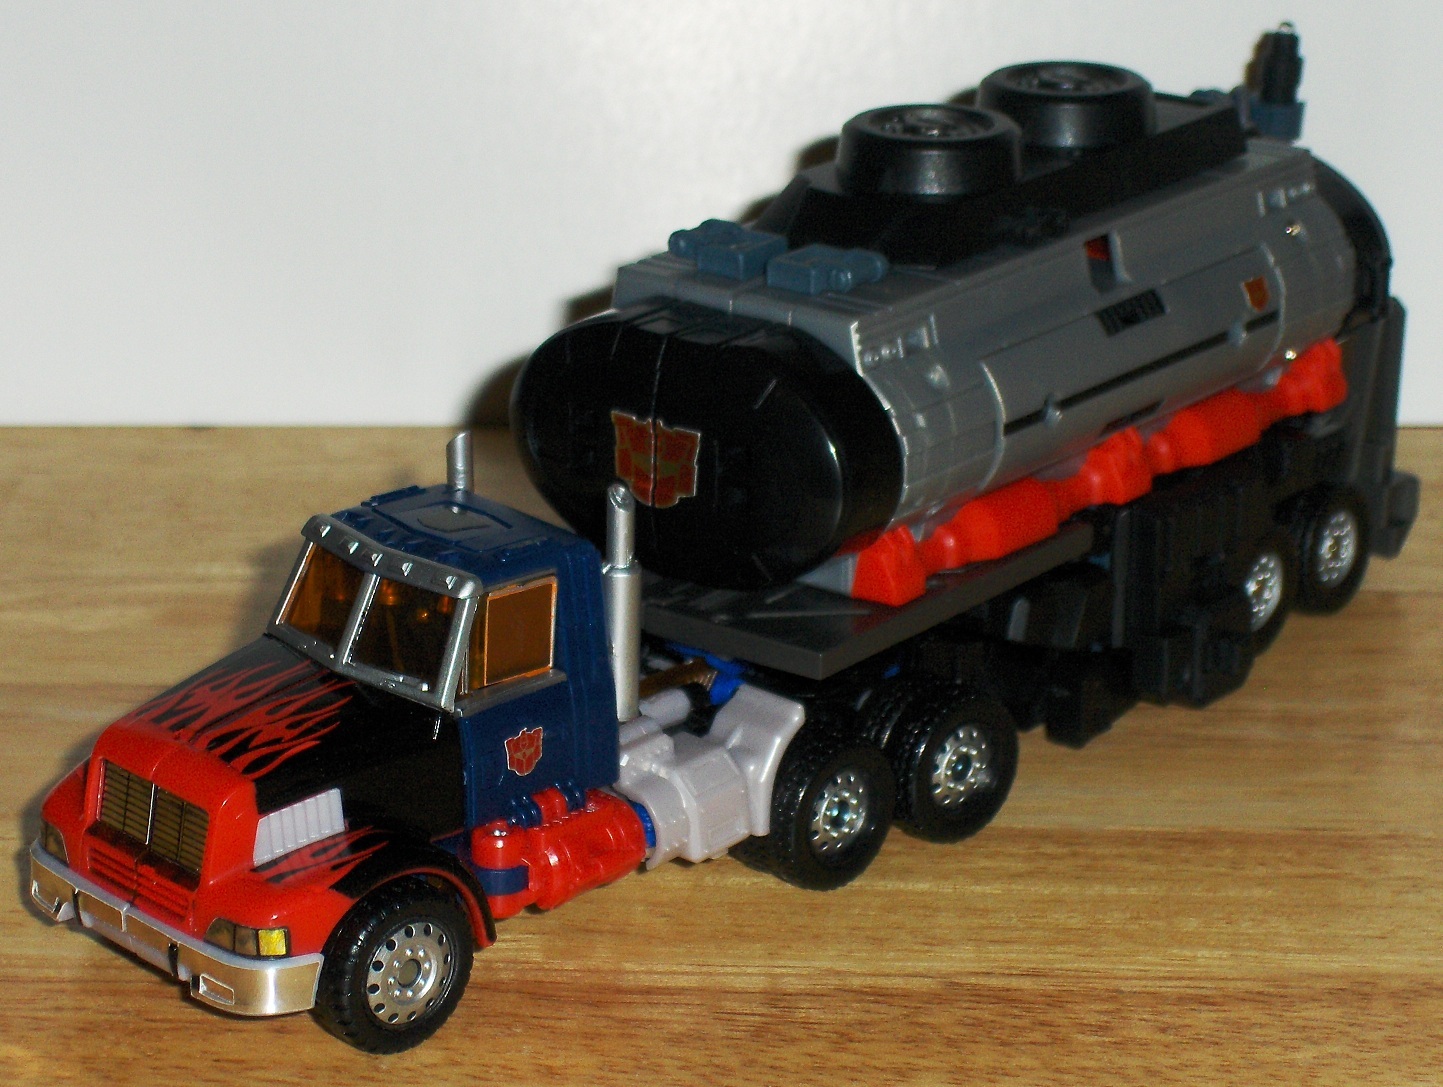
As for the trailer... Well, assuming there are even plans for a set for this, Reprolabels has not produced one yet. I even waited for their January update before doing this review, just in case they'd worked fast and had one ready! (The trailer only came out in December.) If one comes out later and it seems worth getting, I'll then publish an addendum to this review. For now, though, it needed something. I had an earlier Reprolabels set (their movie Hubcap to G2 Volt conversion set) that I had previously decided not to use G2 faction symbols from, instead opting to use some extra standard ones I had laying around. The unused G2 ones were perfect for this, even featuring a pre-split larger one to use on the front of the trailer. The two smaller ones went one each on either side.
|

|
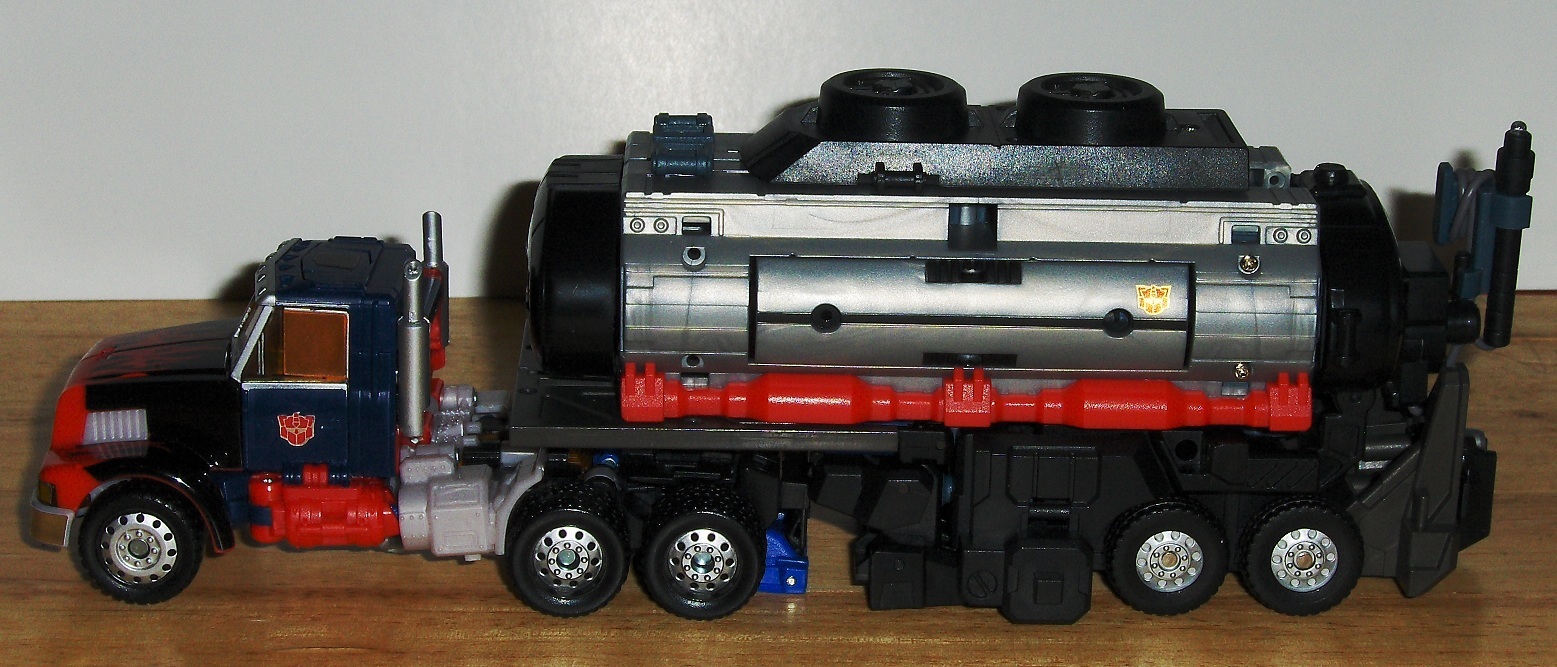
The trailer itself seems quite well built. When we later see what is inside it, you'll see that it has quite a bit of parts inside of it that all fit together like a complex puzzle. So it can be a bit complicated to get all assembled. Once it is put together, however, it holds together well. It is made of sturdy plastic and seems like it should be durable. Of course, I've not quite had it even a week yet, so here's hoping I don't get any nasty surprises later! It pegs right into the trailer hitch that Hasbro was nice enough to put on the cab. It seems to bump a tiny bit with the cab if you try to turn it, but once you have it at the angle you want it to the cab looks lovely sitting on your shelf.
Now... Robot mode!
Now... Robot mode!
|
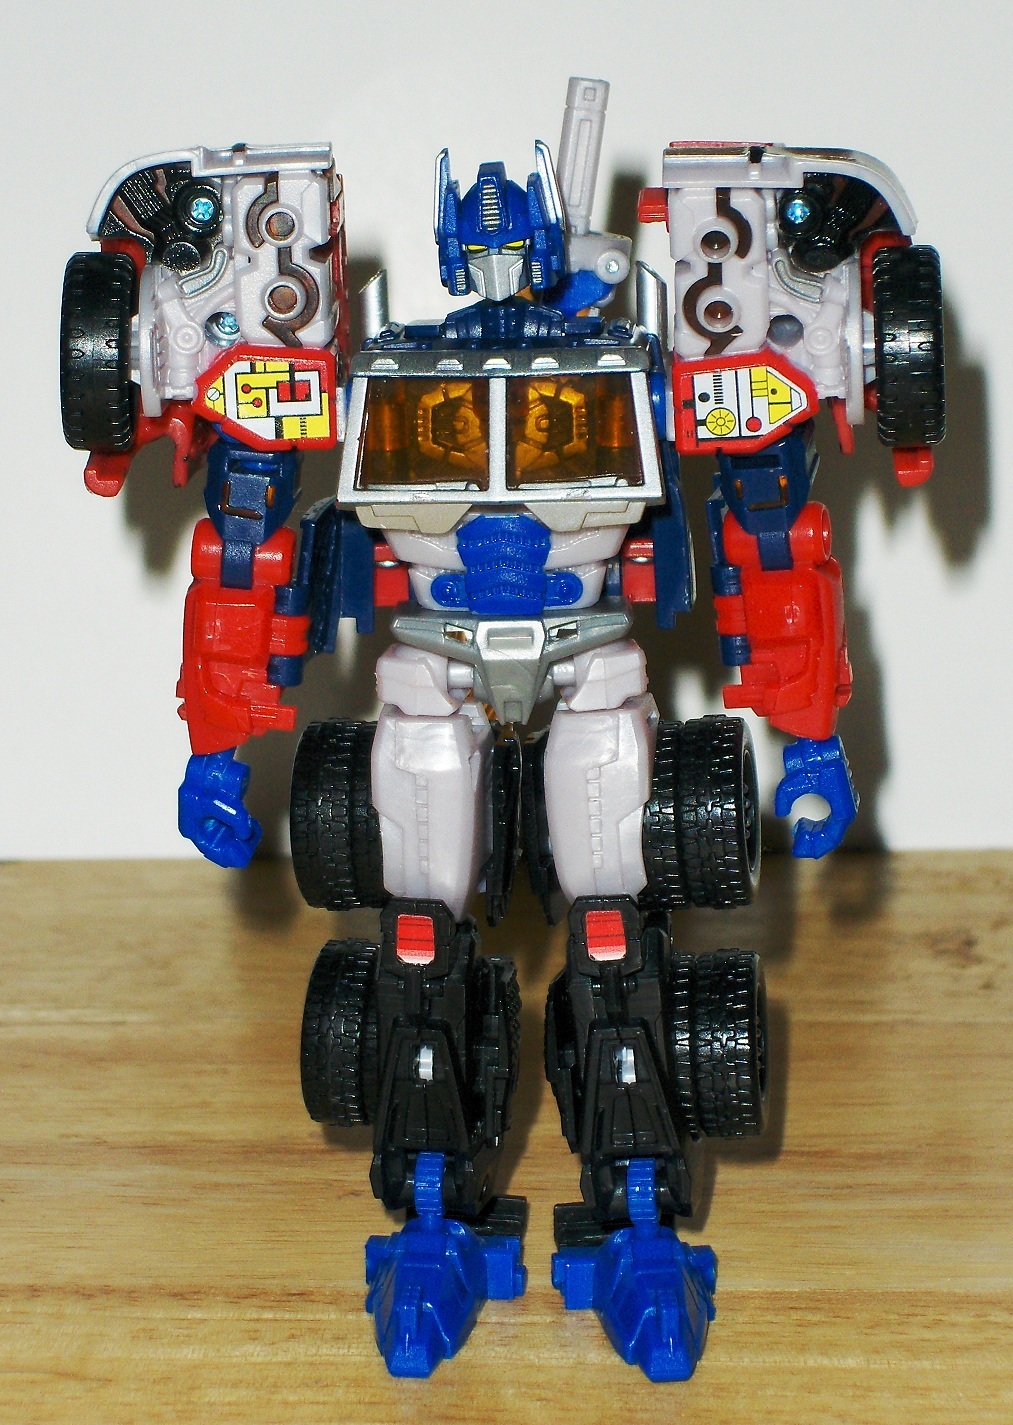
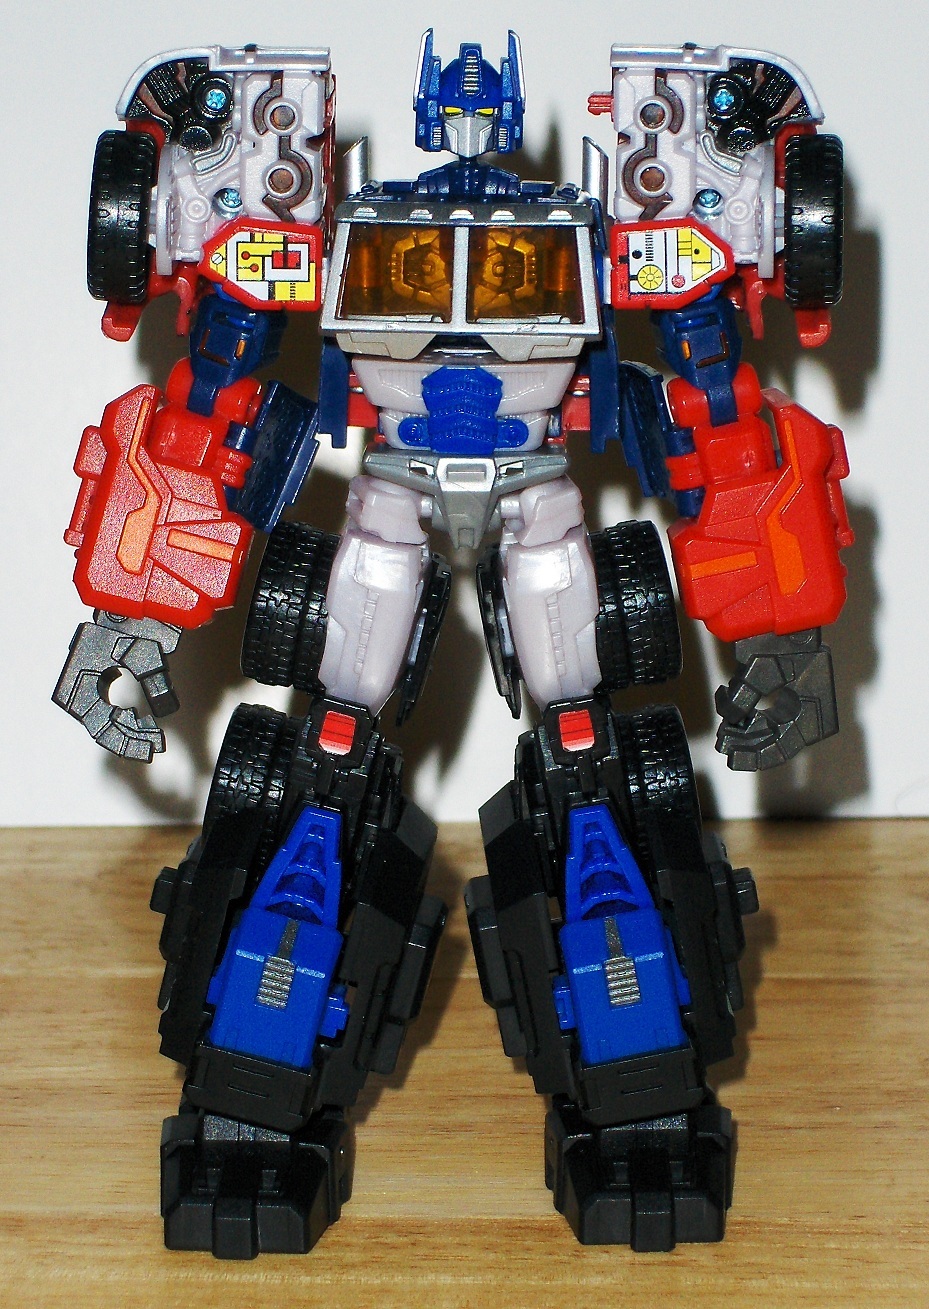
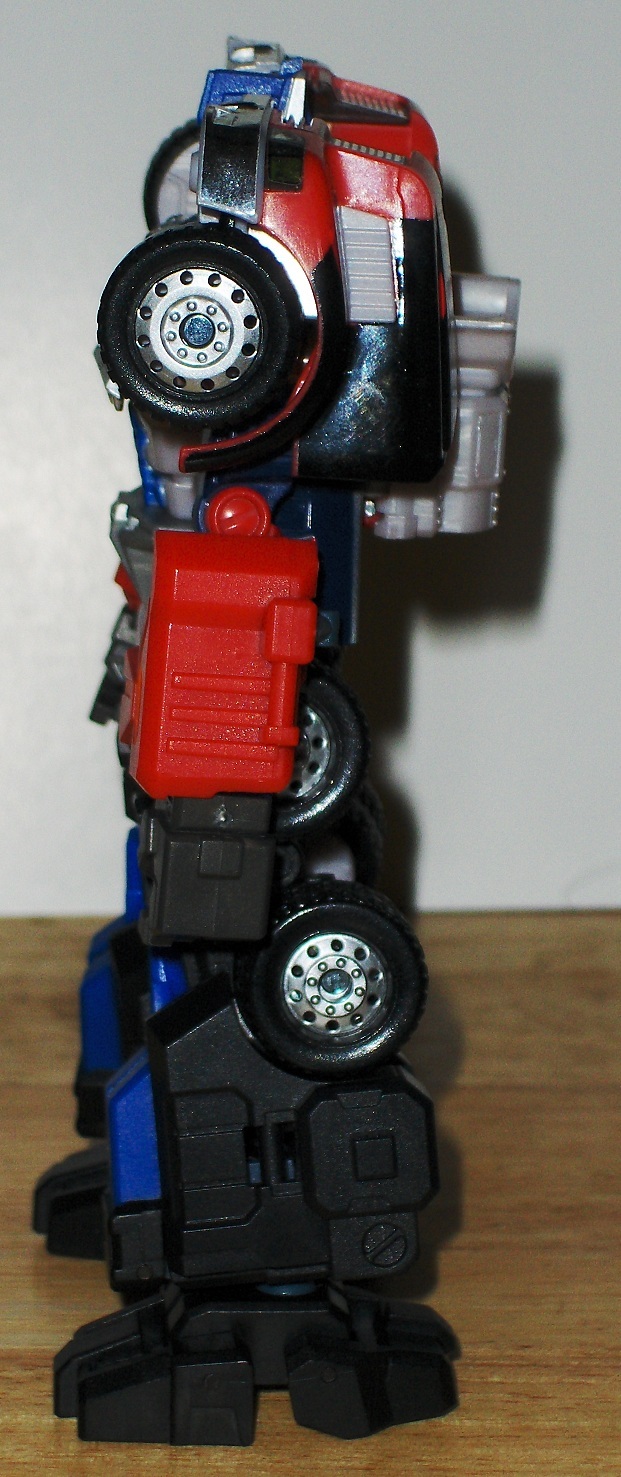
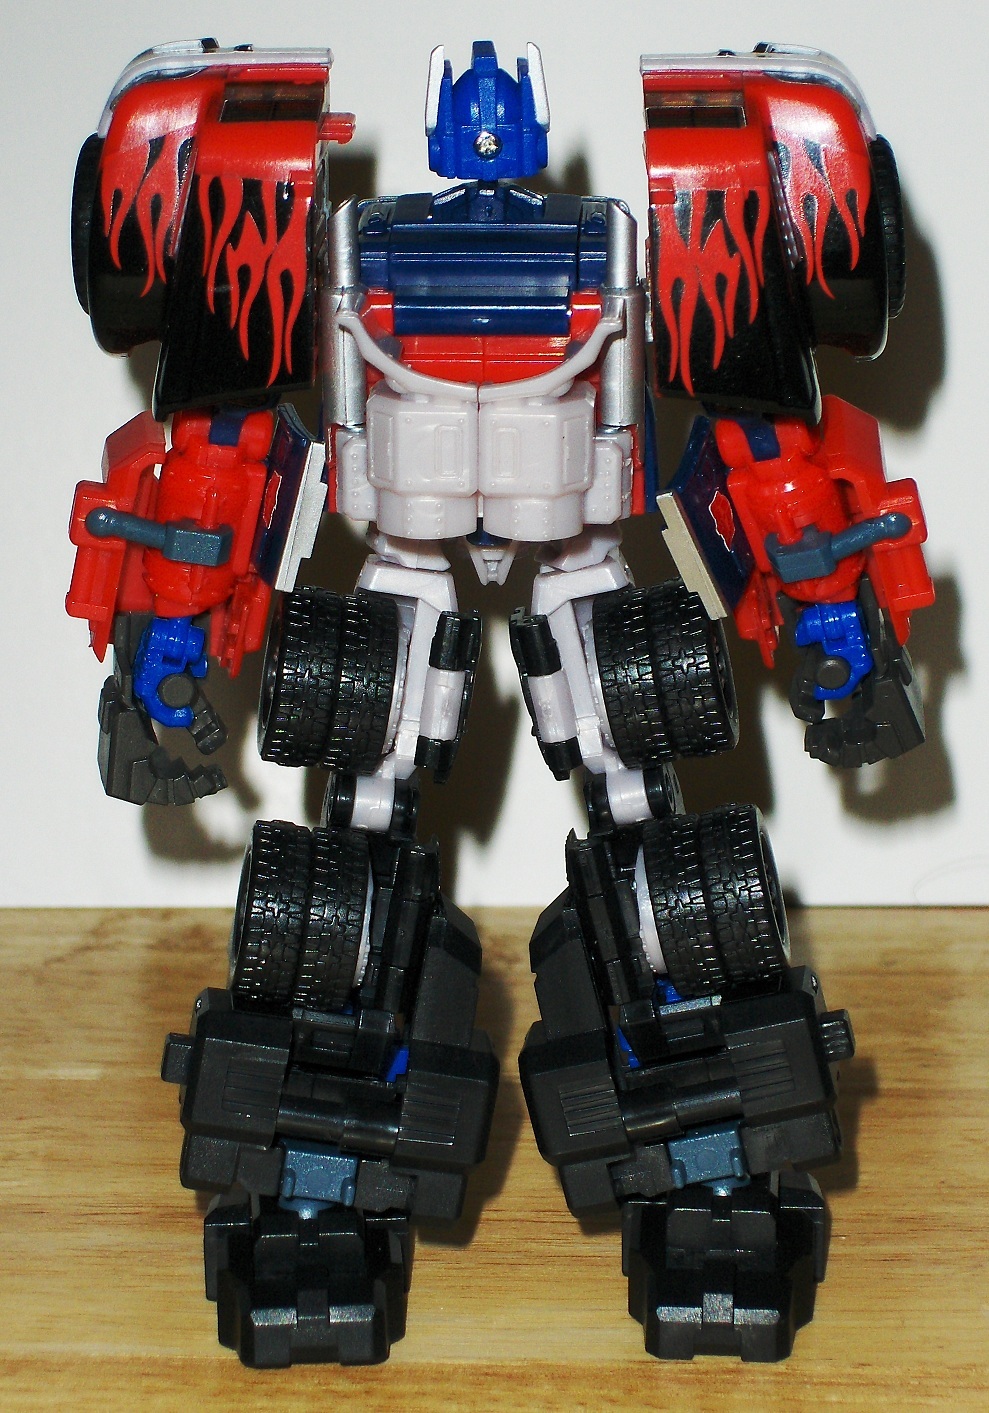
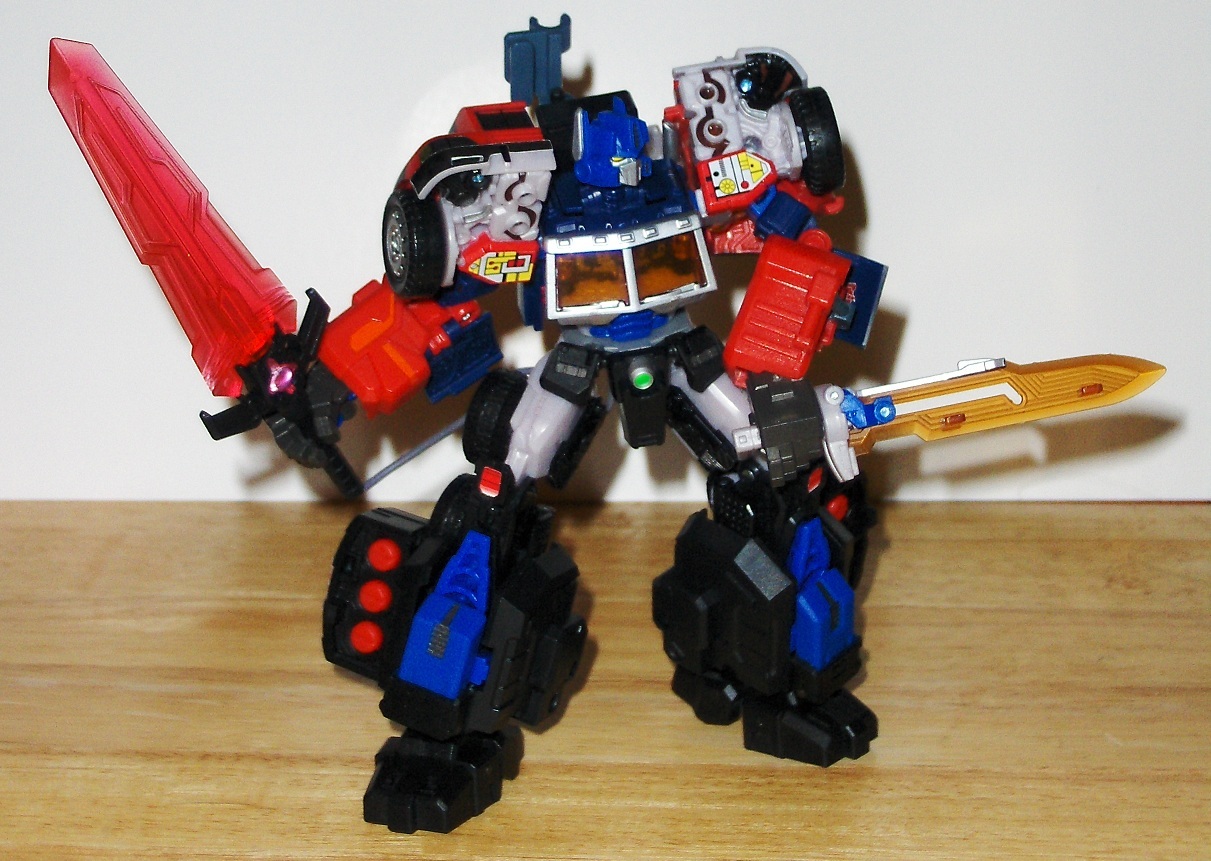
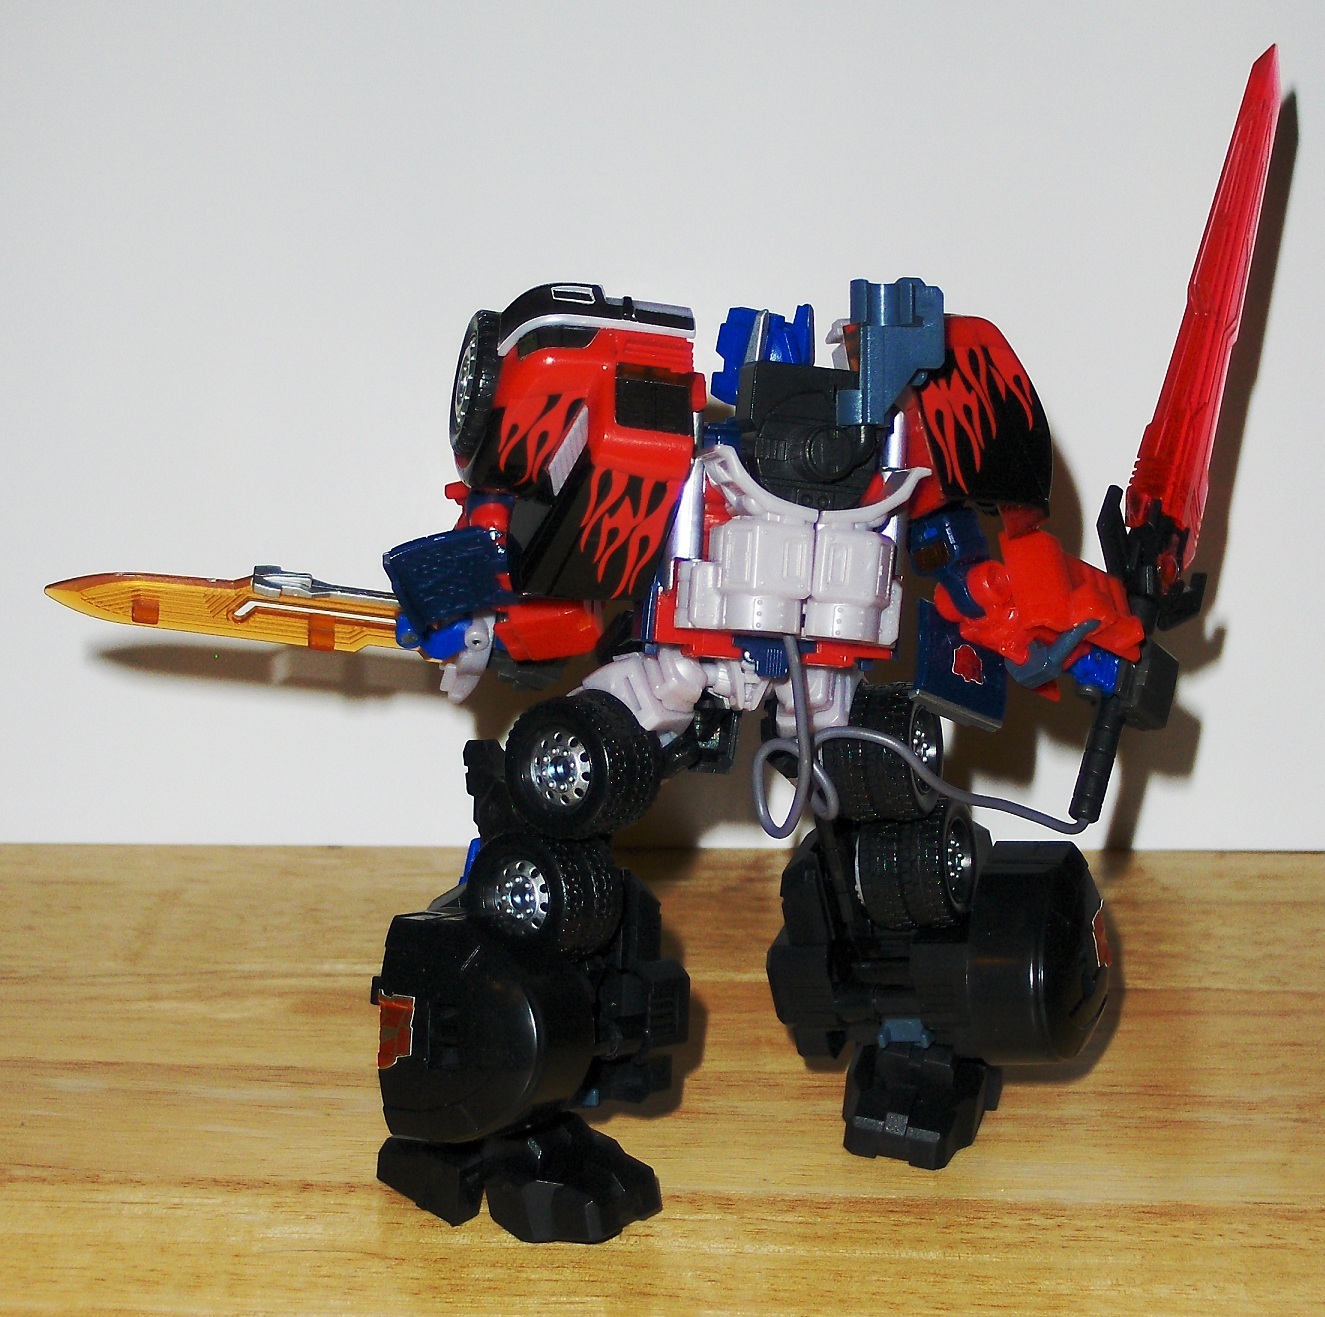
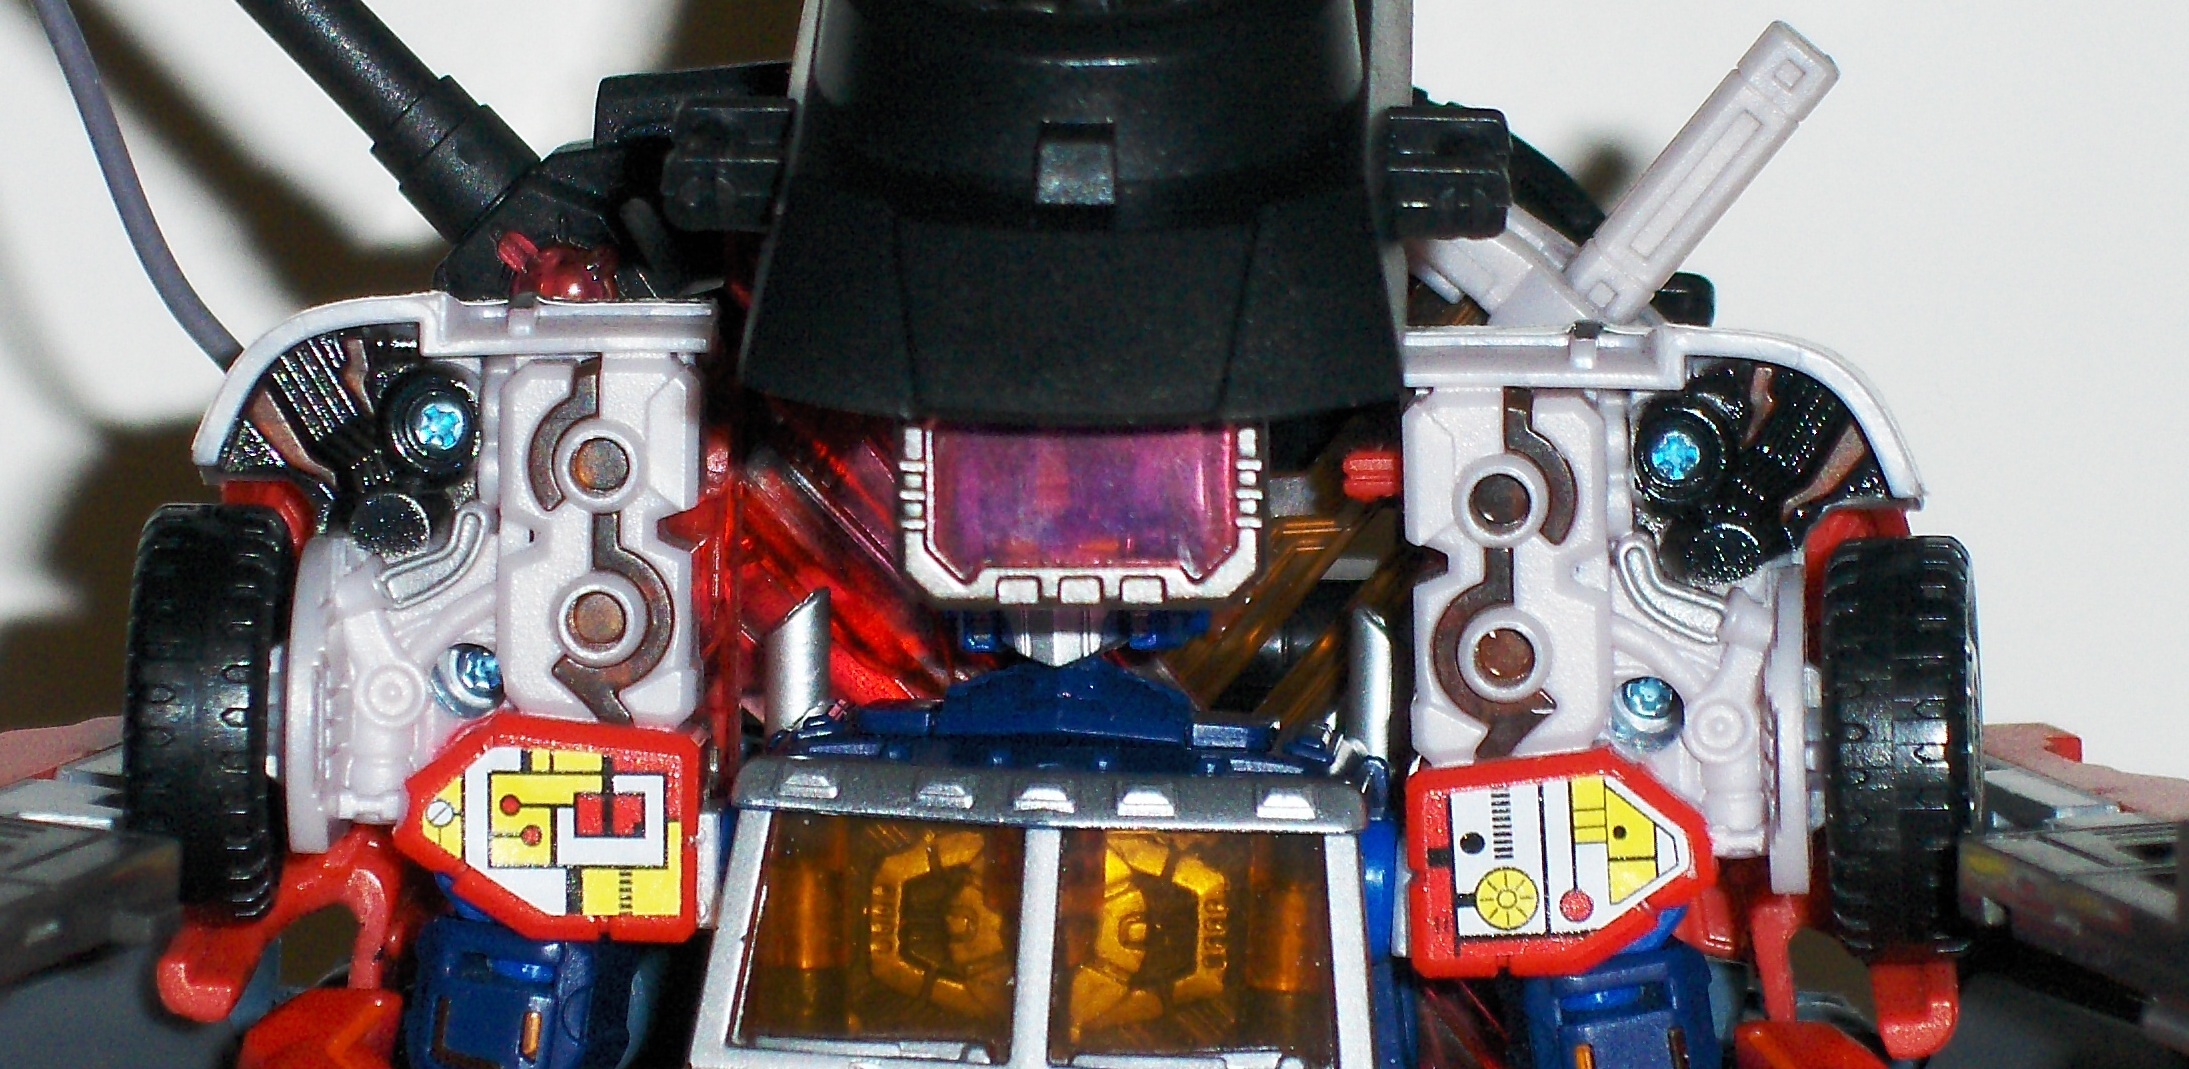
Even before we figure in the upgrades from the trailer, the robot mode is where this figure really shines! This is an excellent upgrade of the concept behind Generation 2 Laser Optimus. It even improves on that figure in a lot of basic ways. While the original figure was an example of an Optimus that featured fake parts to acomplish the "windows and grill" chest that is often carried over from the G1 figure's design, on this figure they actually managed to carry over the actual windows. (They kind of abandoned the grill a bit, but the blue patch on his belly is in the same spot as the fake blue grill on the original figure, so it works!) The transformation on the legs was especially notable, as it features double wheels (something not often seen on Transformers, even truck ones that would make sense having them) which in this mode collapse into the legs. Without that feature, the wheels would stick out way too far on the legs. But with it, the legs slim up nicely.
Reprolabels provided shoulder and knee pad stickers for the robot mode that look like dead ringers for those from the original figure. The silver Sharpie is more promanant in this mode and was somewhat scary to apply, as it was inside of the figure in an area that was not easy to get to, even with some disassembly of the figure! There is a molded Matrix of Leadership on the plastic inside of the windows, a very nice touch even if left unpainted... which it was. But colouring it silver really makes it pop out! Good luck to you if you want to do this to yours. Take your time, and I hope you have steady hands. But if it works, it really looks good. |
|
There were two pieces on this toy that Maketoys provided parts to replace with their trailer. One of them is necessary, otherwise one cannot connect the upgrade's crotch piece to the base figure. This is a new crotch piece for the base figure which looks almost identical to the original, but has two slots for the upgrade one to plug into.
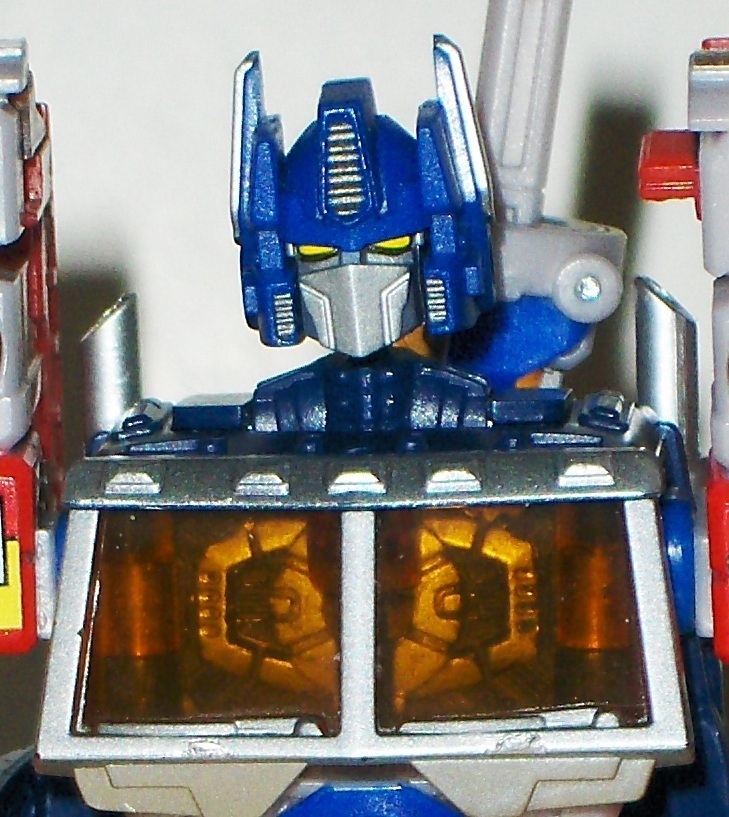
The second is a new head. The new head looks fantastic and is much better then the somewhat funny looking (but not completely objectionable) one that originally came on this figure. This new head is not without a potential major problem, however, which must be addressed here. |
|
The post that the original head plugs onto is somewhat thin. If you're careful, the original should pop off without too much trouble. The new one is very tight to get onto that ball joint, however. Maketoys suggests you put the new head into boiling water for 30 seconds to soften the plastic, but even then there is a good possibility of accidentally snapping the post. Fortunately, Maketoys also released an upgraded head that is in two pieces that screw together over the peg, much easier to get on. This upgraded head also comes with a few pieces to make a repair if you'd damaged your figure trying to get on the original new head. The upgraded head came with my figure when I ordered it, so I just went straight to that one and didn't bother with the original new head. If you are purchasing this, check with where ever you are buying it from and make sure they have the upgraded head available!
|
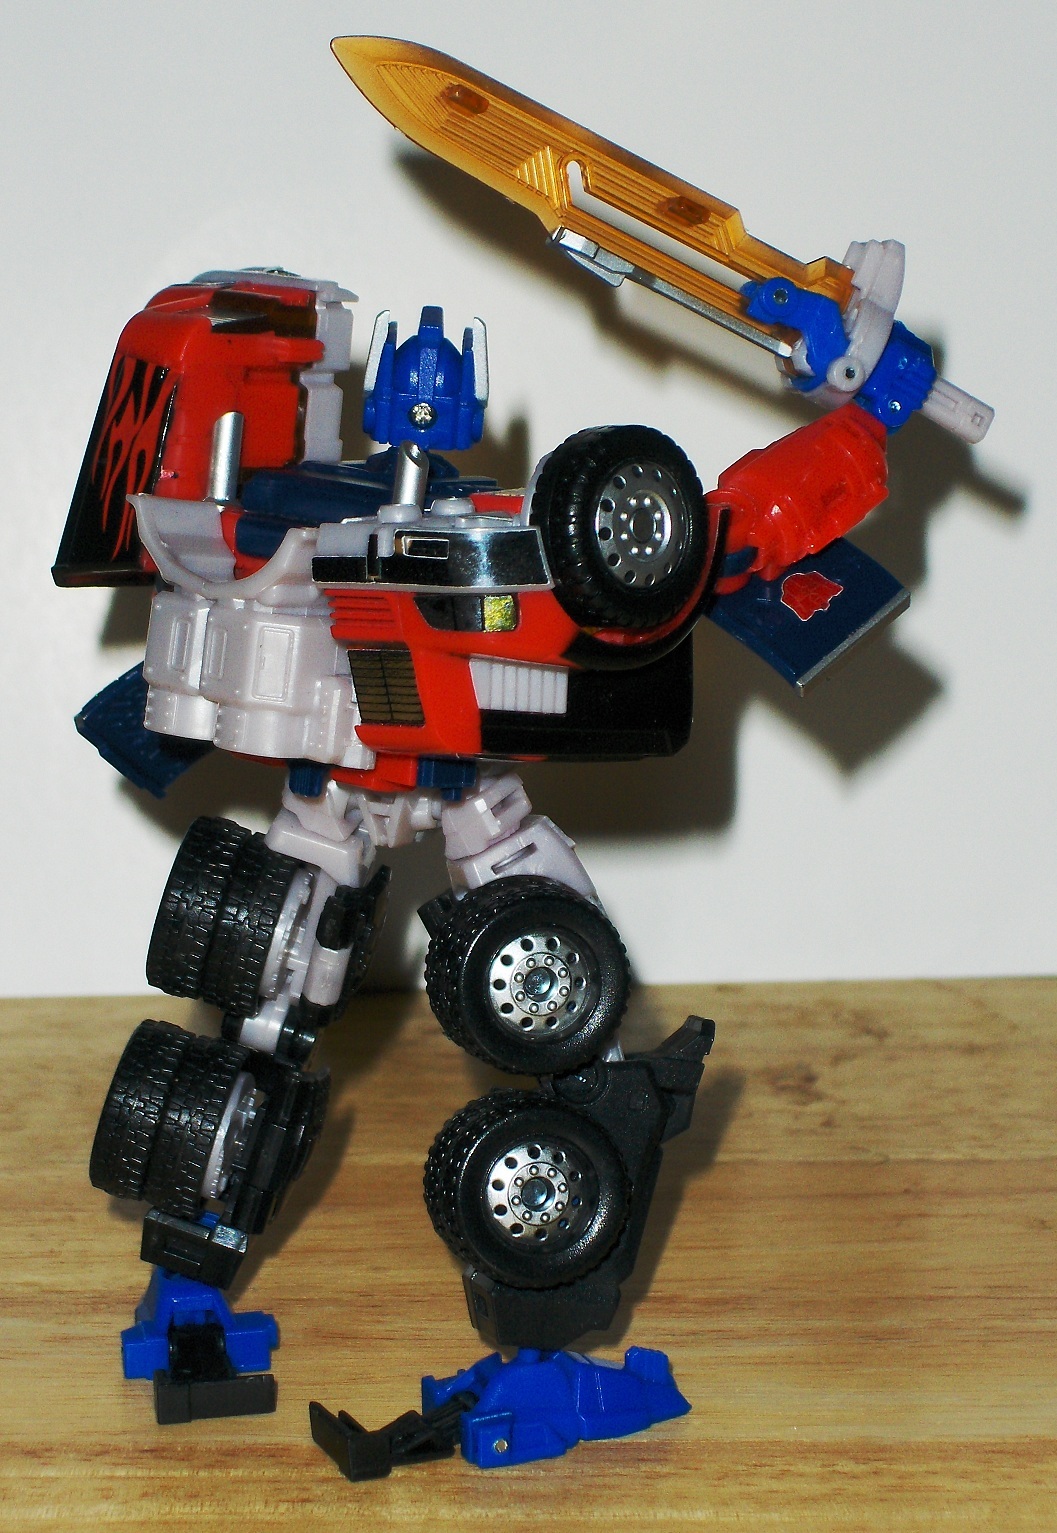
He's a very posable figure, with a nice ball joint in his neck, joints in his shoulders, upper arms, and elbows, very expressively jointed wrists (both a ball joint and a swivle!), ball jointed hips, swivles right below the hips, knees, and really good ankles. There's also a waist swivle which is slightly hampered by the figure's back, but you should be able to get enough out of it for most good poses.
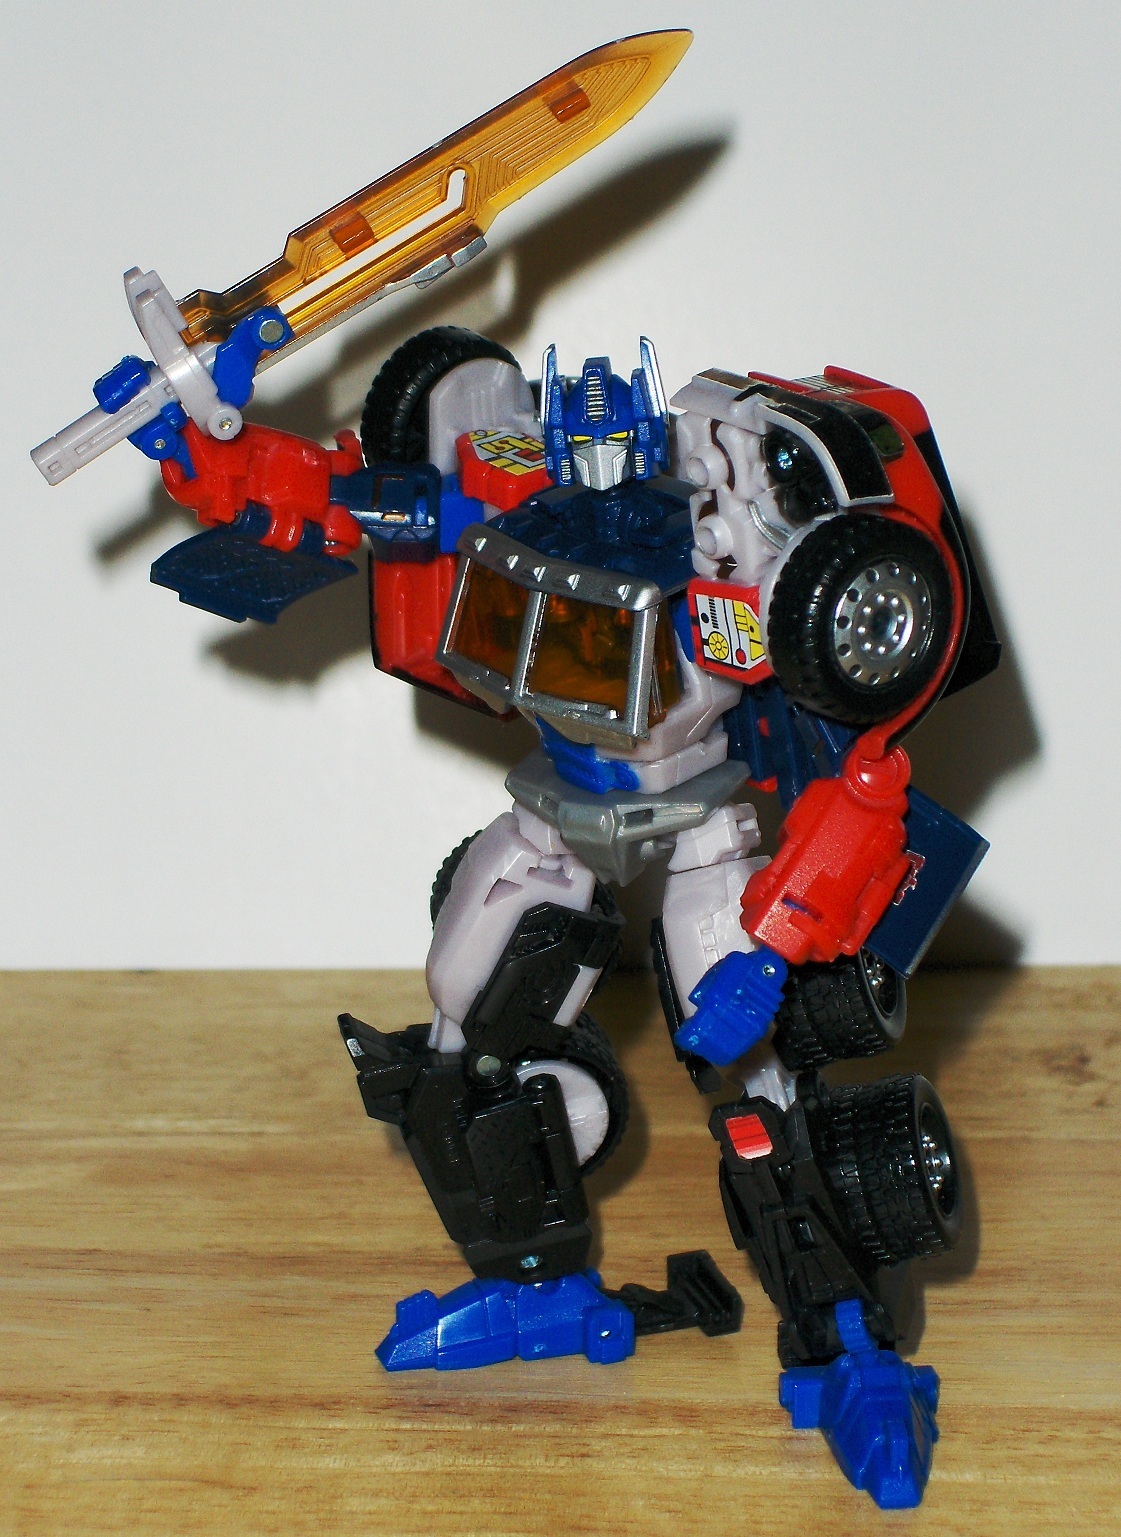
The figure gets a sword that stores on the vehicle mode by becoming the trailer hitch. Looks good enough, but will quickly become a secondary choice as we move onto what you get with the upgrades. Speaking of which, let us move onto that! |
|
|
|
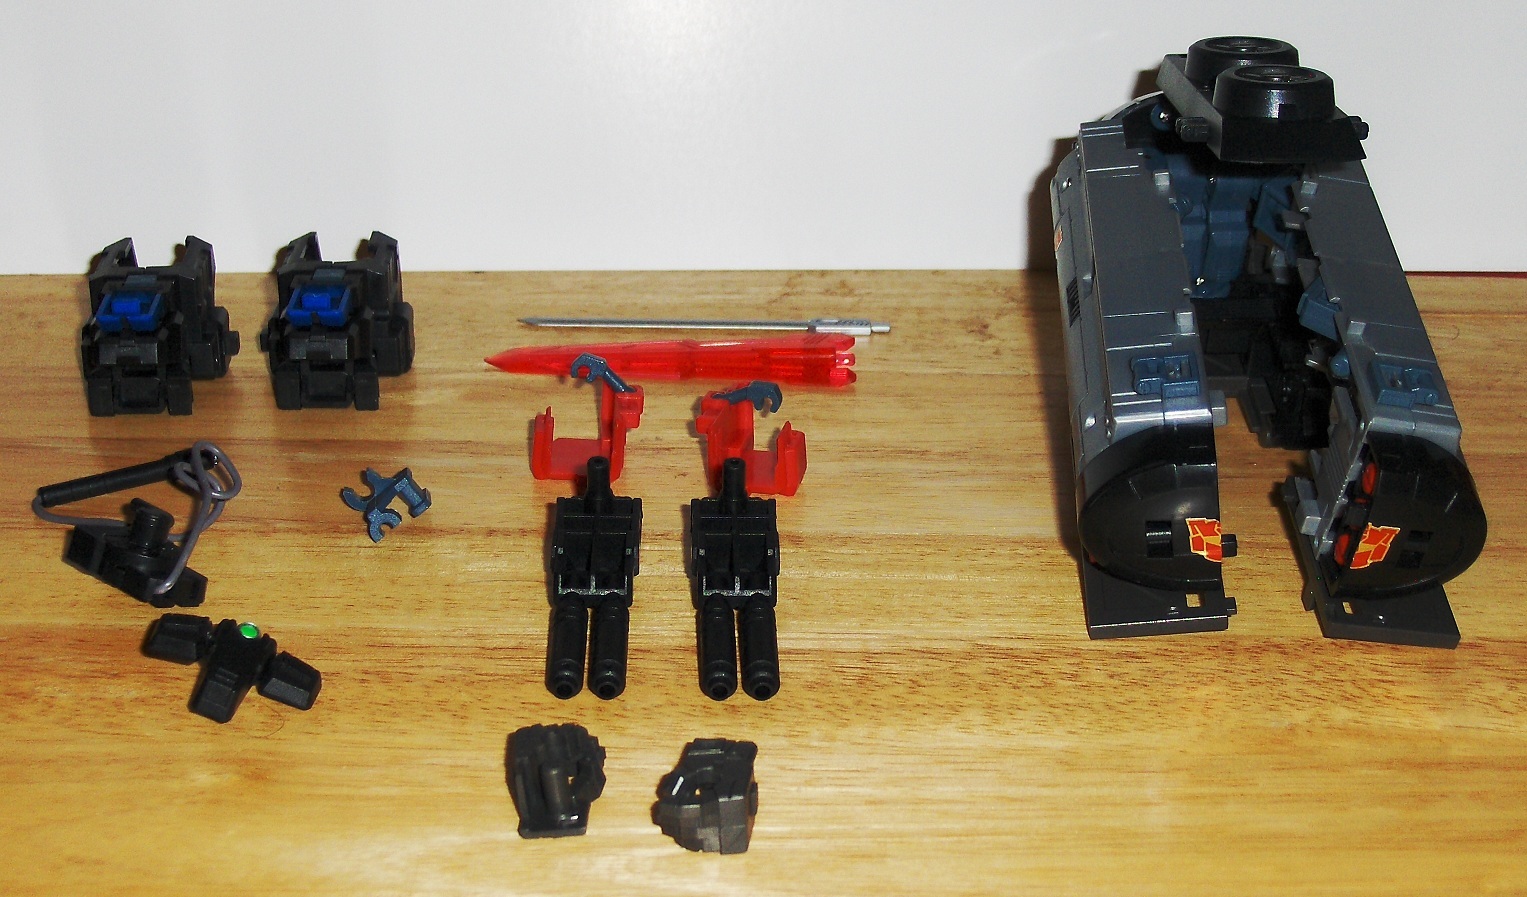
Opening up the trailer, we find it is chock full of pieces. So many pieces that I forgot to take out a few before taking the photo on the right above! So much that I also forgot to put one (the aformentioned crotch piece) onto the figure in the first few photos. So, let us first look at the minimum add-ons. Fold up the base figure's feet as if you were transforming it back into a truck, and you get some new lower legs that clip over them. New hands attach by the extremely simple (yet novel) method of just having them held by the original hands, and then this is hidden behind the new beefier lower arm pieces. Not having the new fists attached directly to the new lower arms allows the upgraded figure to maintain the fantastic wrist posability of the base figure. Much of the rest of the base posability is likewise maintained. (Again, apologies for the lack of upgraded crotch in the below photos.)
|
|
|
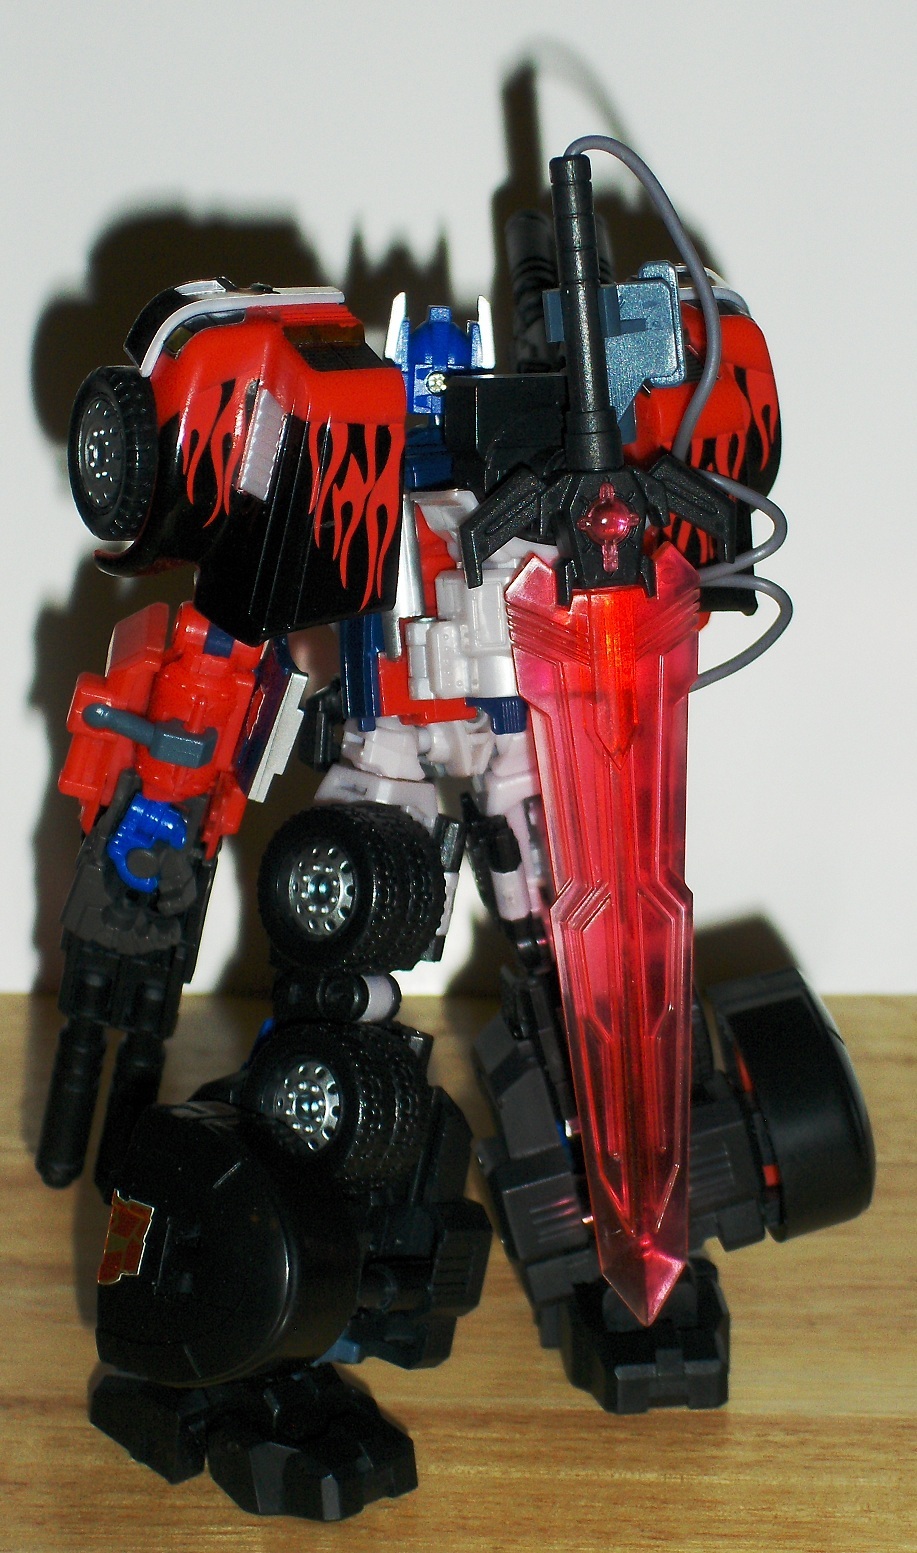
The upgrade set comes with a new sword. The sword consists of three parts. First is a grip which has a light inside of it, and thus also has a wire leading to a battery compartment that fits into his back pack. Second is a handguard. Fnally, you have two choices of blade, either a kitana sort of blade made of solid plastic coloured silver or a larger blade more similar to the original G2 figure's sword that is made of clear redish plastic. Also included for a limited time with the first run of this upgrade set is an additional bonus sword that can be used to replace the soft plastic sword that came with another figure, Generations Drift. That will be talked about more in his eventual review.
Although an attempt was made as you will see below, the light in the sword does not photograph terribly well. It does look much better in person, though, and while not necessary is a nice touch and a bit of a call back to the original G2 figure that also had a light up feature that could cause the sword to glow. Just be careful with the wire. It is long enough that it should not cause any problems with posing the figure, but if one is not careful I could see the wire accidentally being pulled out from the battery box.
Although an attempt was made as you will see below, the light in the sword does not photograph terribly well. It does look much better in person, though, and while not necessary is a nice touch and a bit of a call back to the original G2 figure that also had a light up feature that could cause the sword to glow. Just be careful with the wire. It is long enough that it should not cause any problems with posing the figure, but if one is not careful I could see the wire accidentally being pulled out from the battery box.

|

|
|
|
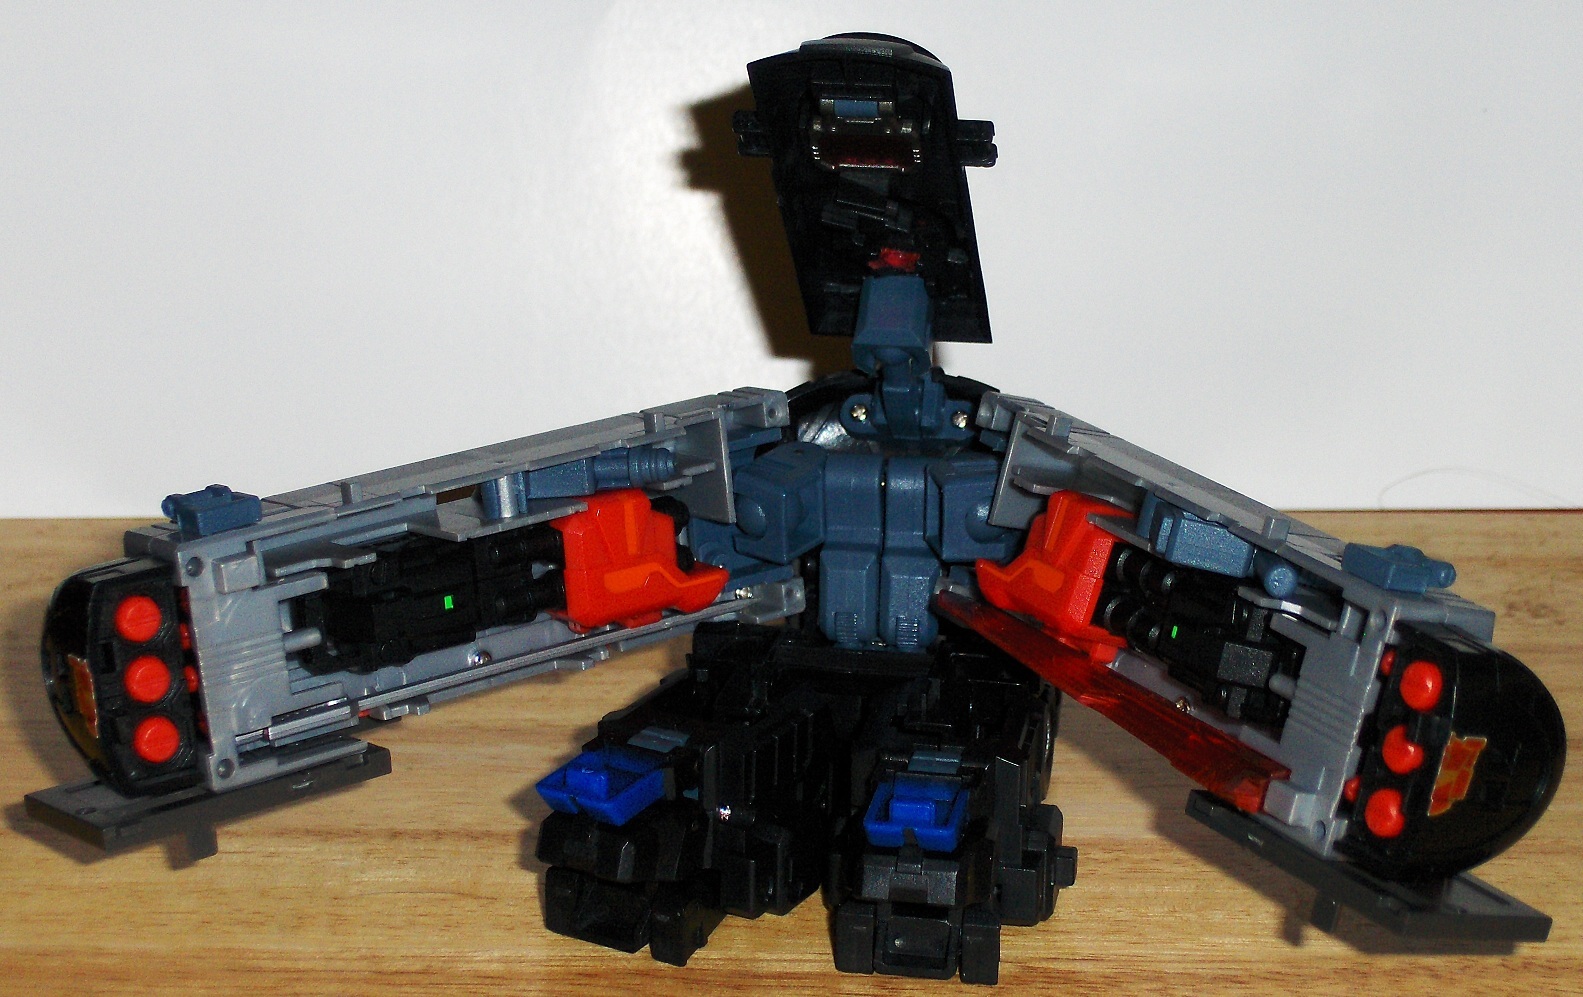
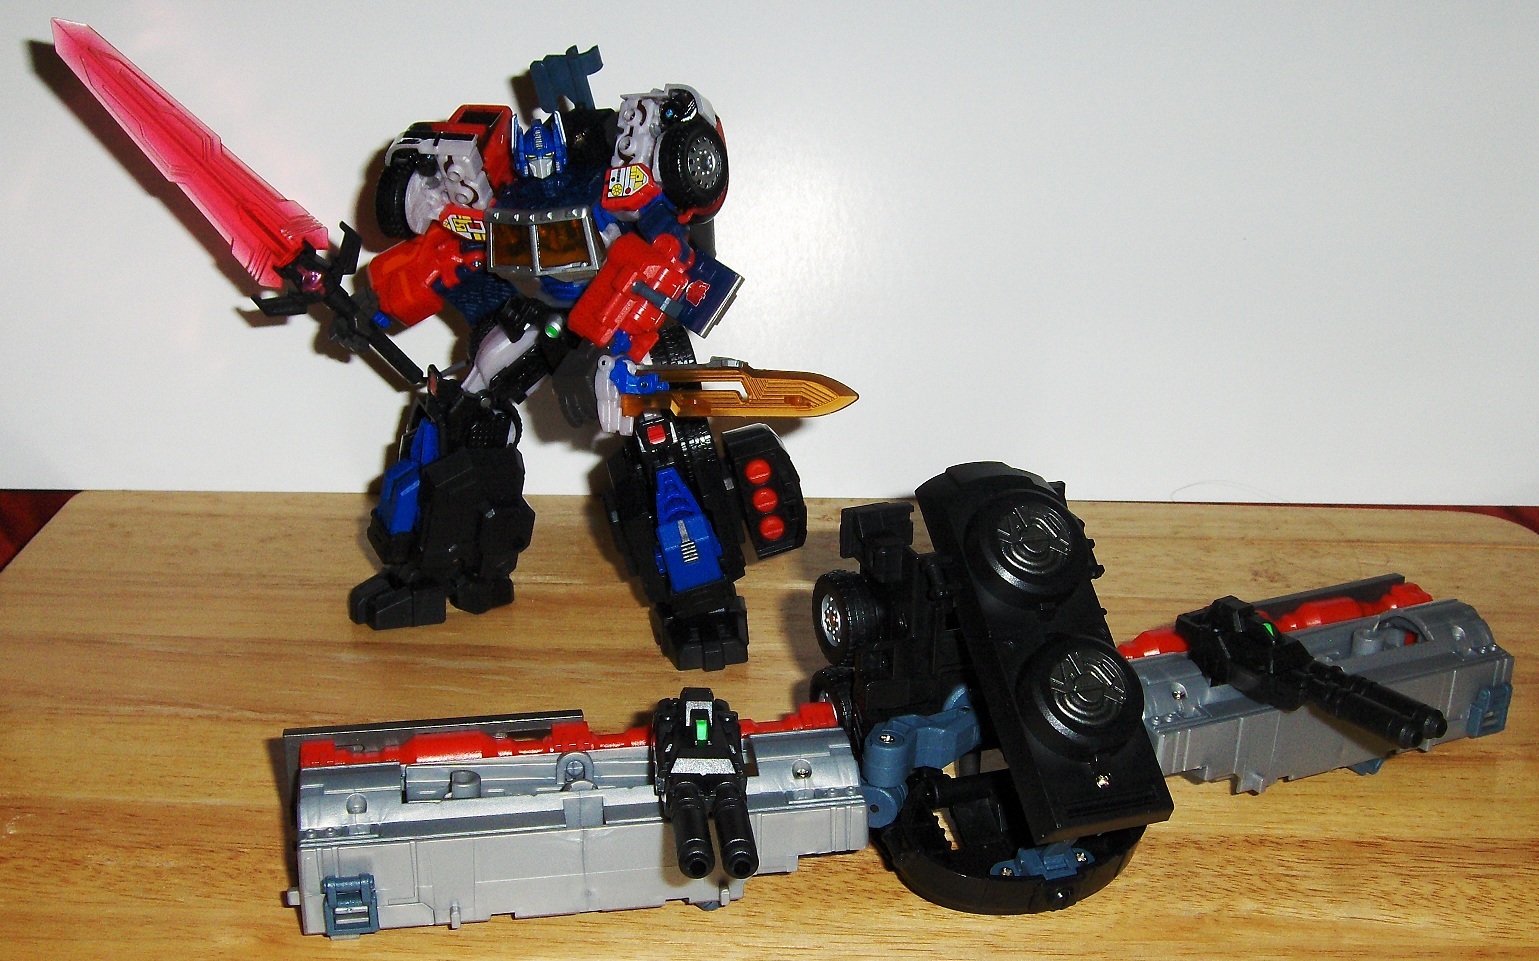
The front of the trailer splits into two missle pods you can attach to Optimus's lower legs. As for the trailer itself, the instructions from Maketoys do not really supply any suggestions for anything for it to do as a stand alone piece, but it isn't too difficult to jurry rig a "battlestation mode" that works as a call back to the G2 figure. Here's one suggestion to the right.
As you can see, the sword that came with Prime can still be wielded by his upgraded self for some duel-wielding action. Or he can also hold either (or both) of the black cannons that to the right are on the makeshift battlestation. |
|
Oh, and photos from here on feature the upgraded crotch piece! It is worth note because it actually features some posability. No, not like that, get your mind out of the gutter! The two flaps on either side are attached to the center with a ball joint, so you can keep them flush against the legs when posing them if you wish. Just take care when posing the legs that you don't pop them from their ball joint, as they are small and may be easy to loose.
|

|
|

|

|
|
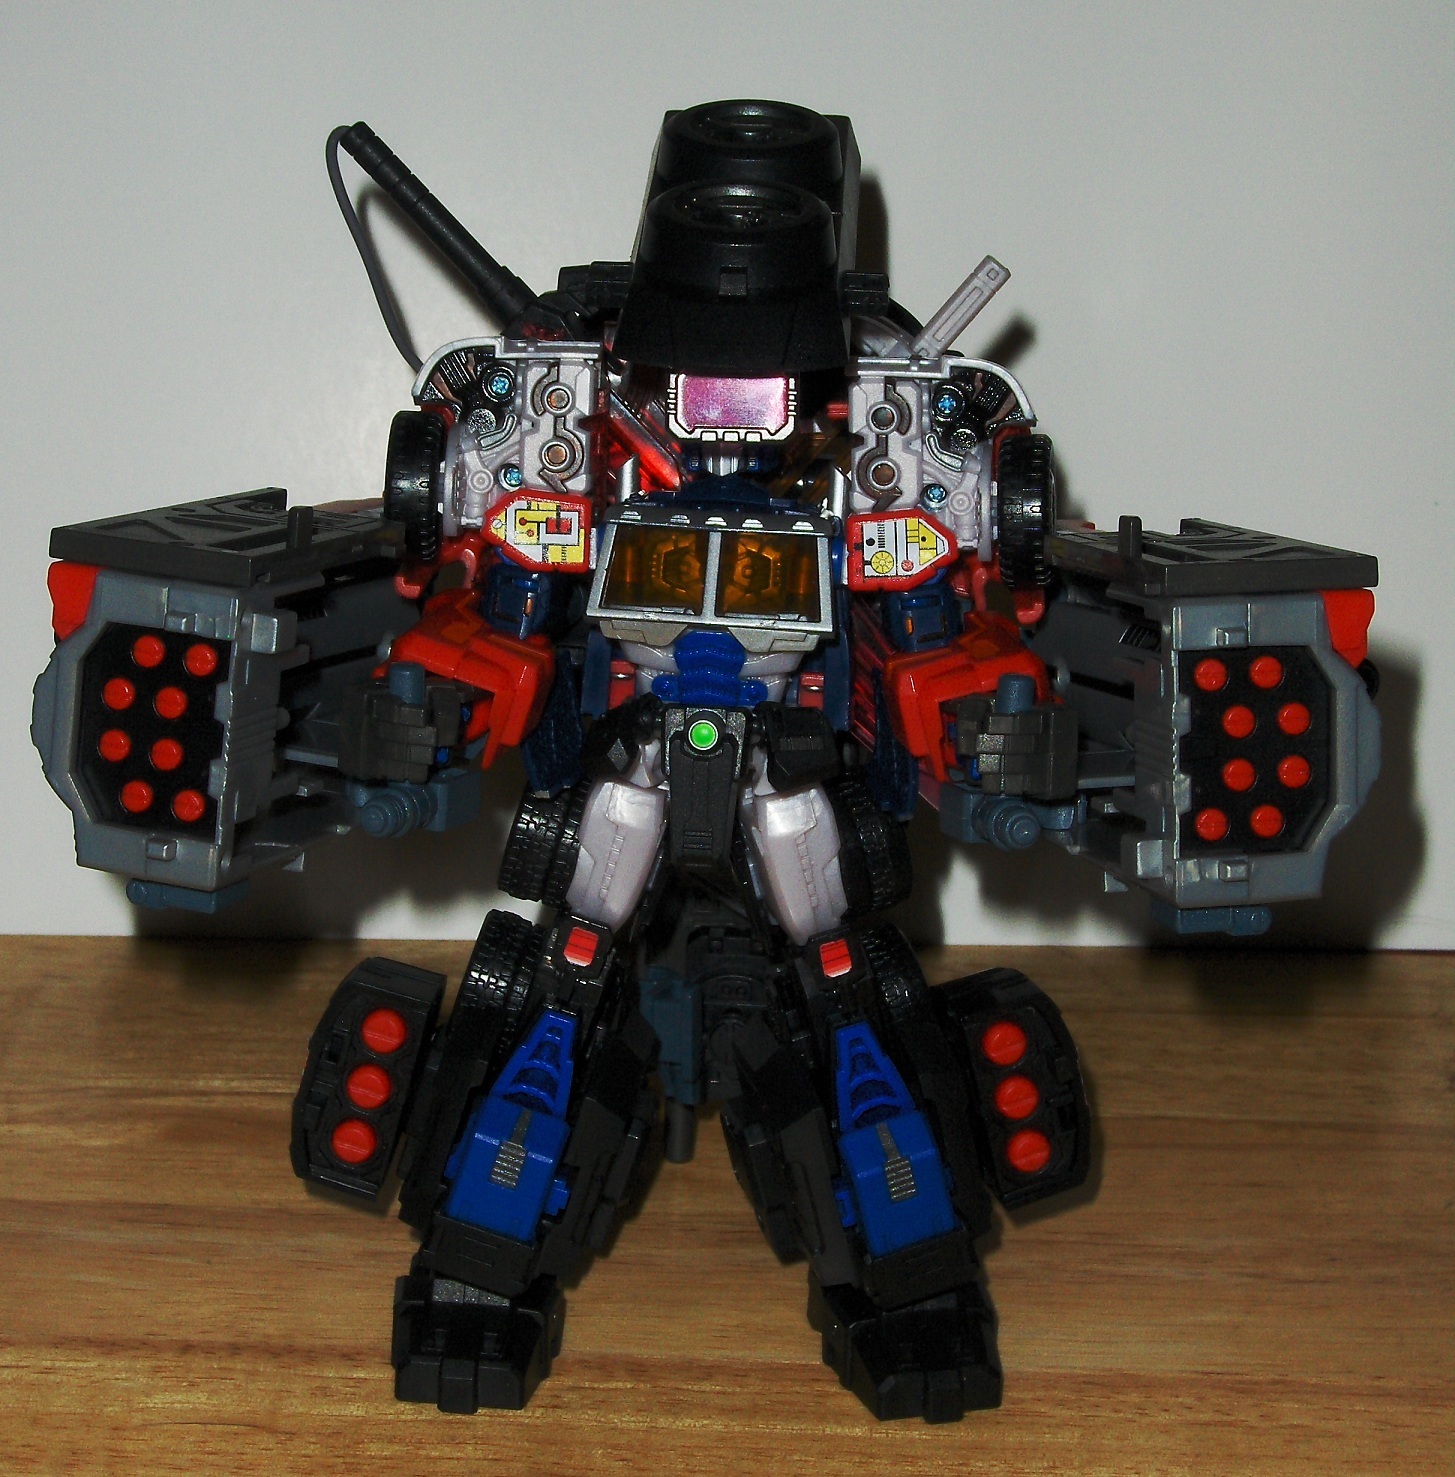
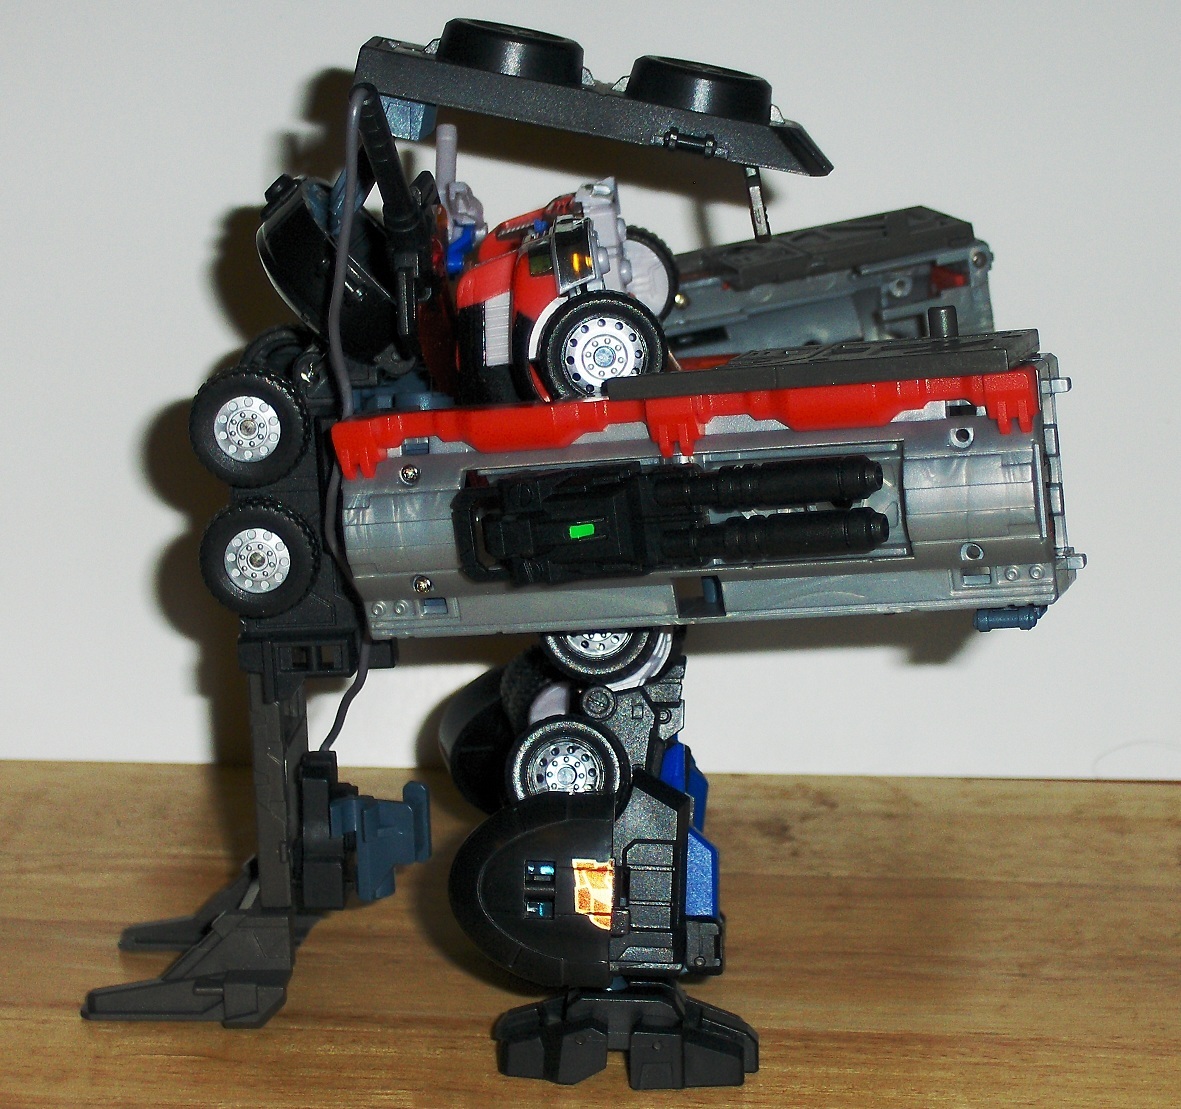
Now for the final touch... The whole trailer can be attached to Optimus as a large backpack with two huge cannons for him to wield, giving you this:
|
|

|
|
I like the concept, but in execution I think this mode falls a little short. I think it would work better if the piece that holds the heads up targeting display could have folded away better, such as folding away completely behind his back if you didn't want to use it. As it is, while you can theoretically at least fold the targeting display itself up, with the large black overhang over Prime's head I feel compelled to have it justified by having the targeting display in use... which has the unfortunate side effect of obscuring Prime's face from view.
|
|
This does certainly give Prime some massive fire power, however! A nice option, and I am glad they included it. For my own tastes, however, I think in robot mode I would rather display him with the makeshift battlestation and wielding the duel-swords in a more dynamic pose.
|
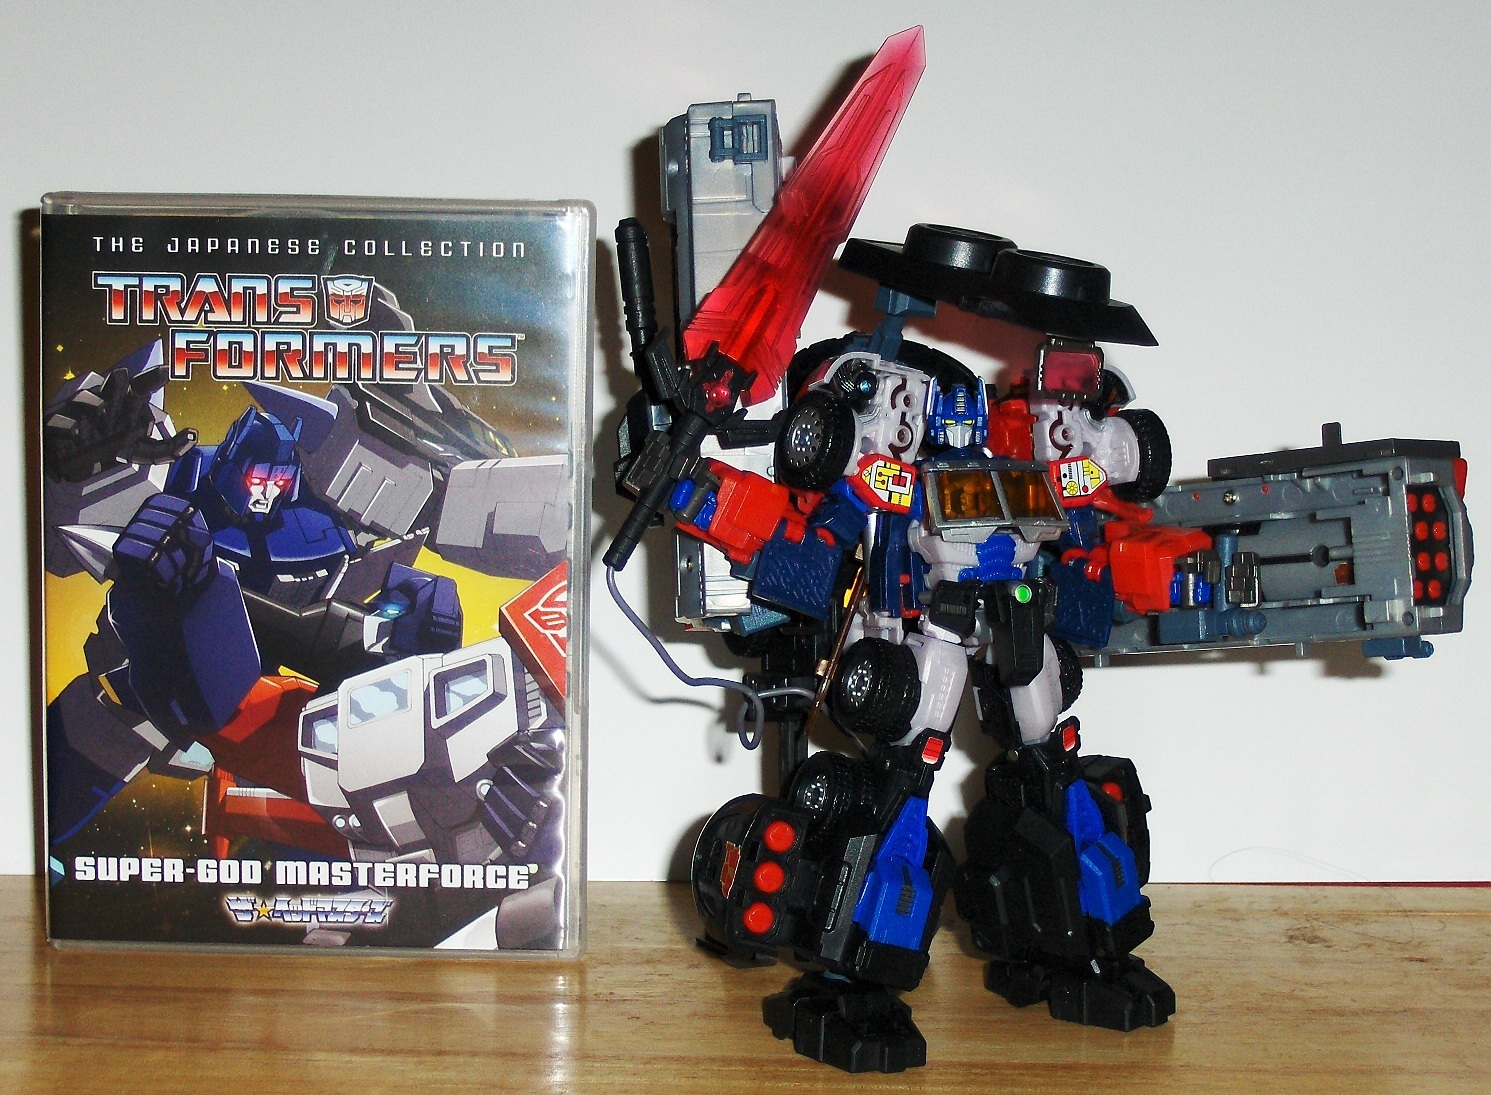
Size comparison with the ever-faithful DVD case!
Final thoughts: The base figure has an excellent robot mode, an inovative transformation, and a good looking vehicle mode... but the vehicle can be fiddley to get to hold together right. The add-on trailer is a solid premere by new third party company Maketoys. The base figure is relitively new so could theoretically be a good toy for kids. The add-on is expensive at over $100, and contains some small parts that are likely not U.S. toy safty law complient, thus making it likely you'd not want that part for your kids. But it takes an already impressive toy and makes it an exquisie adult collectable. |
As a recent release, Maketoy's Battle Tanker trailer is still widely available. If you can afford it, I highly recomend it. If you can't afford it, I suppose if you're feeling lucky you can try waiting a bit. Sometimes third party products eventually end up going down in price if they prove to not be too popular. But if the opposite is true, and if this eventually stops production, you could be finding yourself someday thinking, "Man, I wish I'd picked that thing up when it was only $100!" I remember having a similar lament for a long while with Fansproject's City Commander set, and I got lucky when they eventually rereleased it. Of course, for those that missed that second chance with that set, even the rerelease is now in short supply and has shot up in cost. Moral: wait at your own risk.
Of course, with that extra sword for Drift being advertised as a bonus with this accessory's first run, I suspect that is a hint that it is being planned to be in production for at least a little while yet, so as long as you don't care about the Drift sword you should be able to wait a little bit.
Final word, though, is that I would be happy to recomend both the base figure and the add-on trailer.
Review added 11 January 2012 by Yotsuya. Please comment!
An addendum to this review, covering a release of a dedicated Reprolabels sticker set for the Battle Tanker trailer, is available to read here. Enjoy! (Yotsuya, 9 May 2012)
